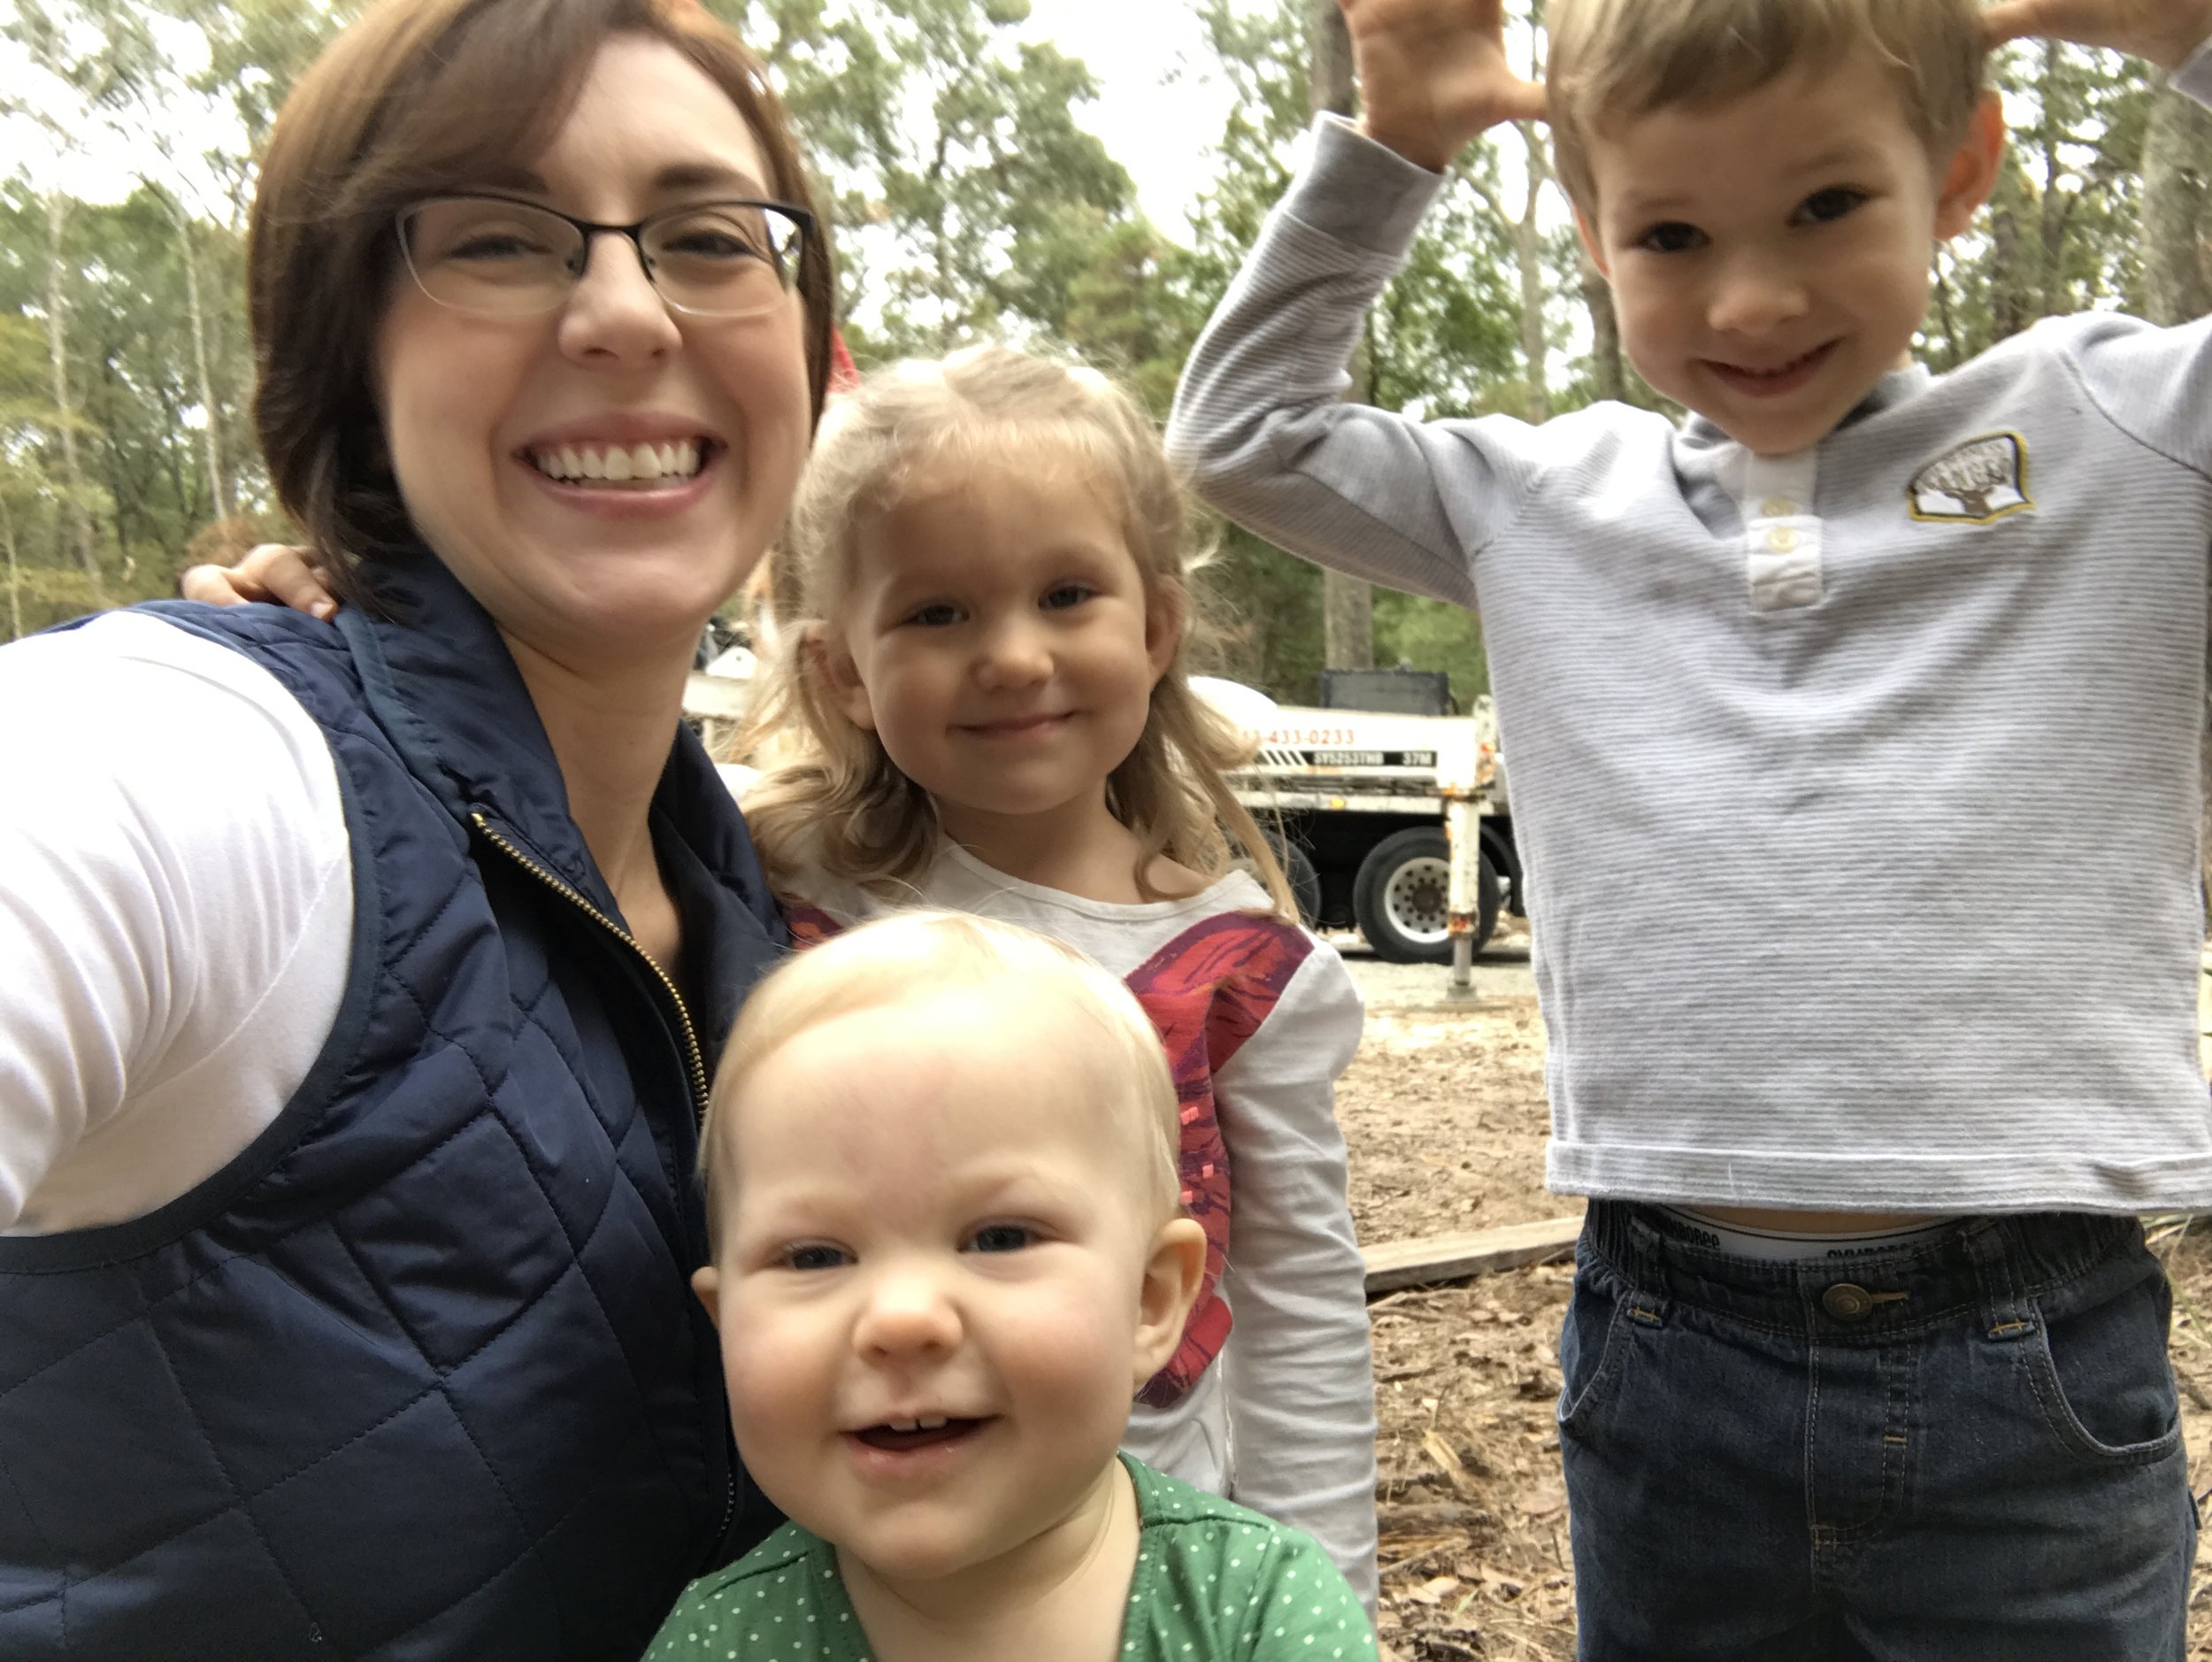
Polished & Clean- How to Maintain Polished Concrete Floors at Home

Most of the info I have found for the care of a polished concrete floor is targeted to commercial cleaning or maintenance crews.   After some trial and error, here's what we've come up with for maintaining our floors.

CleanConcrete.png

Cleaning Routine

Daily:

  • Quick dust mop with microfiber broom helps keep small particles from collecting on the floor and causing scratches which make the floor look dull.  
  • Spot clean any spills immediately.  Saturate spill with cleaner, let sit for a few minutes, wipe up before cleaner dries.

Weekly:

  • Vacuum. Use a vacuum with a hard floor setting so the bristles do not repeatedly brush over the polished surface, causing abrasion.
  • Spray on a pH Neutral Cleaner like Bona Stone Tile and Laminate Cleaner and wipe off with a microfiber mop before it dries.

Monthly:

Semi-annually:

  • Rent a high-speed burnisher and buff the floor to renew shine.  
Photo Jan 19, 11 01 40 AM.jpg

What NOT to do:

Do NOT let spills set.  Clean them up right away.

Do NOT use adhesives on the floor (like painters tape).  

Do NOT use acid based cleaners like these:

  • Swiffer Wet-Jet
  • Pine-Sol
  • Bleach
  • Vinegar
  • Citrus Based Cleaners


Big thanks to REFINE Concrete services for making our polished concrete dreams come true!

Stay tuned for an upcoming post on the details of our polished concrete floors!

Additional Resources:

Maintaining High-Traffic Polished Concrete Floors from ConcreteNetwork.com

POLISHED CONCRETE HOUSTON | THE BENEFITS from REFINE Concrete


Your Master Bathtub Came From WHERE?!?

Costo.  That's right... it came from COSTCO! 

The OVE Emma Freestanding Tub is the perfect fit for our modern style. It is the show stopper that makes our minimalist master bathroom a true retreat!

We purchased it online from Costco.com and had delivered straight to our General Contractor's warehouse a few months prior to when it needed to be installed.

Why we love it:

At about 1/2 the price of our initial selection, we cannot even begin to say enough good things about this tub!  But we'll try.  Here are the highlights:

  • It's acrylic, so not as heavy as a porcelain or cast iron tub but still feels solid. 
  • It was fully assembled and easy to install (ours was professionally installed by a plumber during construction). 
  • Most importantly, it is generously sized for soaking.  This thing is a whopping  66.9"L x 43.3"W x 23.2"H. The littles even like to use it on occasion and pretend they are in the swimming pool!
OVE_Emma_Tub_Costco_hellocrofts.jpg

GUESS WHAT?  It's on sale right now! 

Regularly $1099 with $150 manufacturer's rebate, that makes it $949 including shipping and handling!  This price also includes a decent looking floor mounted tub filler with hand held shower, which wasn't even part of the deal when we bought our tub. 

Costco's website says the sale is valid 1/29/18 through 2/23/18. While supplies last. 

This tub is gorgeous and it's a great deal!

This is not an affiliate post or anything like that, we just LOVE this tub that much. Also, we felt a lot more comfortable purchasing products that had been reviewed by actual people, so we want to do the same and share our experiences with others. 

If you are like us and have a whole mess of kids to bathe or are just looking for an awesome tub for your modern master bath... unbelievably, you can find this one at COSTCO!
 

Modern_Master_Bathtub_Emma_Costco.png

Modern Master: New Bed

Furniture Swap

In anticipation of a full house of guests for our first Thanksgiving in the new house, we are swapping around furniture in all the bedrooms.   See our PLAN to follow the shuffle!

The bunk beds, which are currently unstacked and in separate kid rooms are being moved into the girls' room, to be bunked as they get a little older.  Our queen bed with Hollywood frame is moving to our son's room.  Now it can double as a second guest room with private 3/4 bath.  The guest room got it's new bed this past Summer, so that one will stay put.

All of which means.... (drum roll) we are finally buying ourselves a new bed and mattress for the Master! 

Specs:

LexMod Camille Headboard in Dark Grey.  

LexMod Sharon Bed Frame in Dark Grey

Zinus Memory Foam 12 Inch Premium, Cloud-like Mattress, Queen

Photo Nov 22, 8 37 28 AM.jpg
modern master french seem headboard

The detail of the French seam on the headboard takes it up a notch from just a boring upholstered rectangle to a piece of furniture with modern detailing. 

Next Steps:

Now I'm ready to start styling all these bedrooms!

To round out our space in the Master, I'll be shopping for:

If you are ready for a bedroom refresh, try rearranging furniture, buy or make a new duvet cover and check out these great ideas from West Elm and Wayfair:


Hurricane Harvey & The New House

Preparation Day

Friday.  Sabbath preparation day.  And that Friday, Hurricane preparation day.

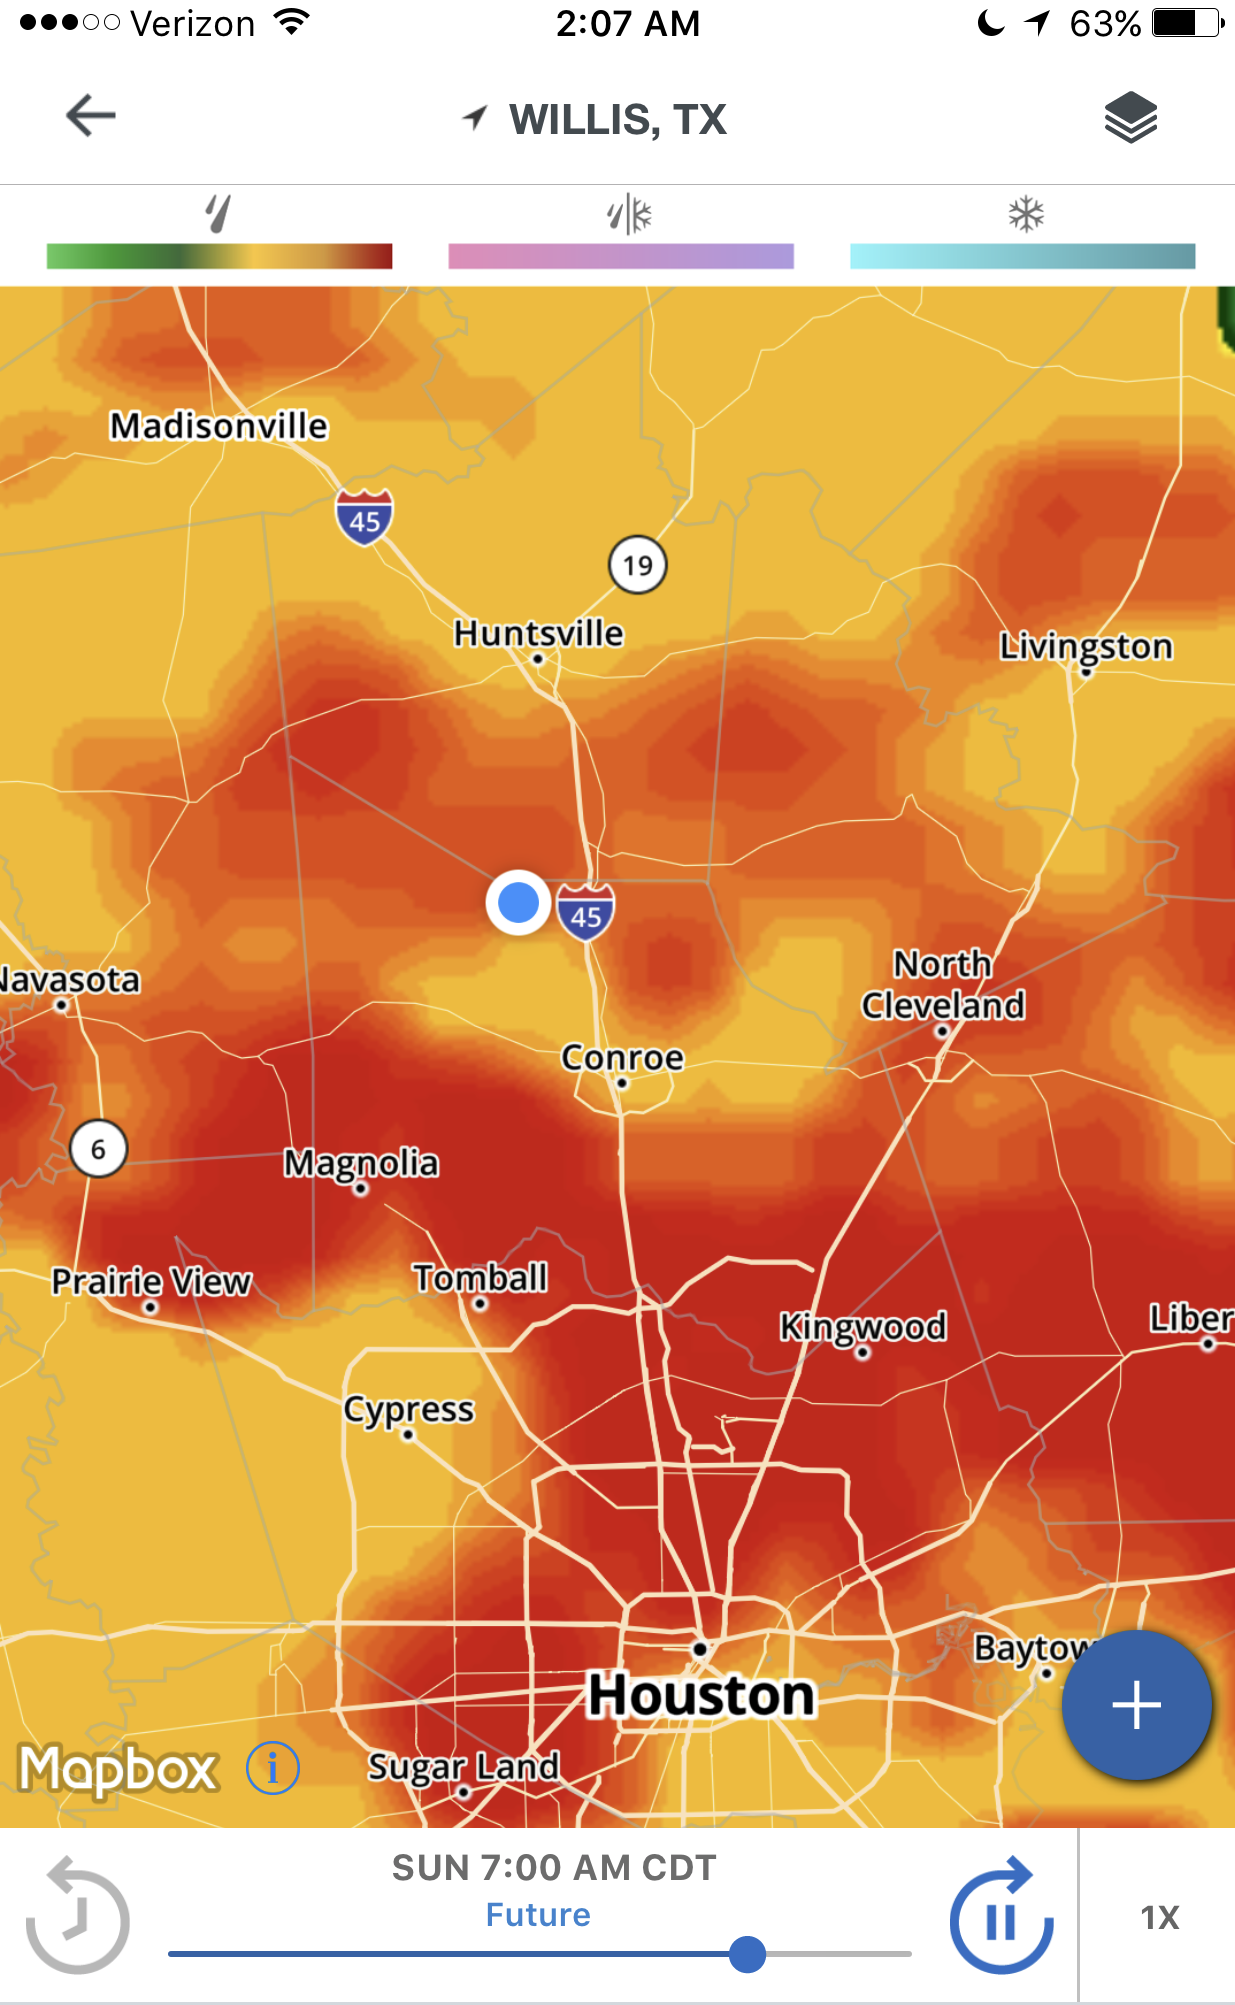
We saw it coming earlier in the week and we were as prepared as we could be by that day, but there are always last minute things right before the storm comes. Filling up extra water canisters, pulling out the flashlights and so on.

For us, the power went out before the storm arrived.  A vehicle hit a power pole down the road, totally unrelated to the hurricane.  So as the Sun set at the end of the week, we waited with candles and Harvey closed in.

We prayed as we knew our friends down the coast were getting hit first. Thankfully, our power was restored within about six hours, just in time for us to watch as the storm coverage began here.

The Storm

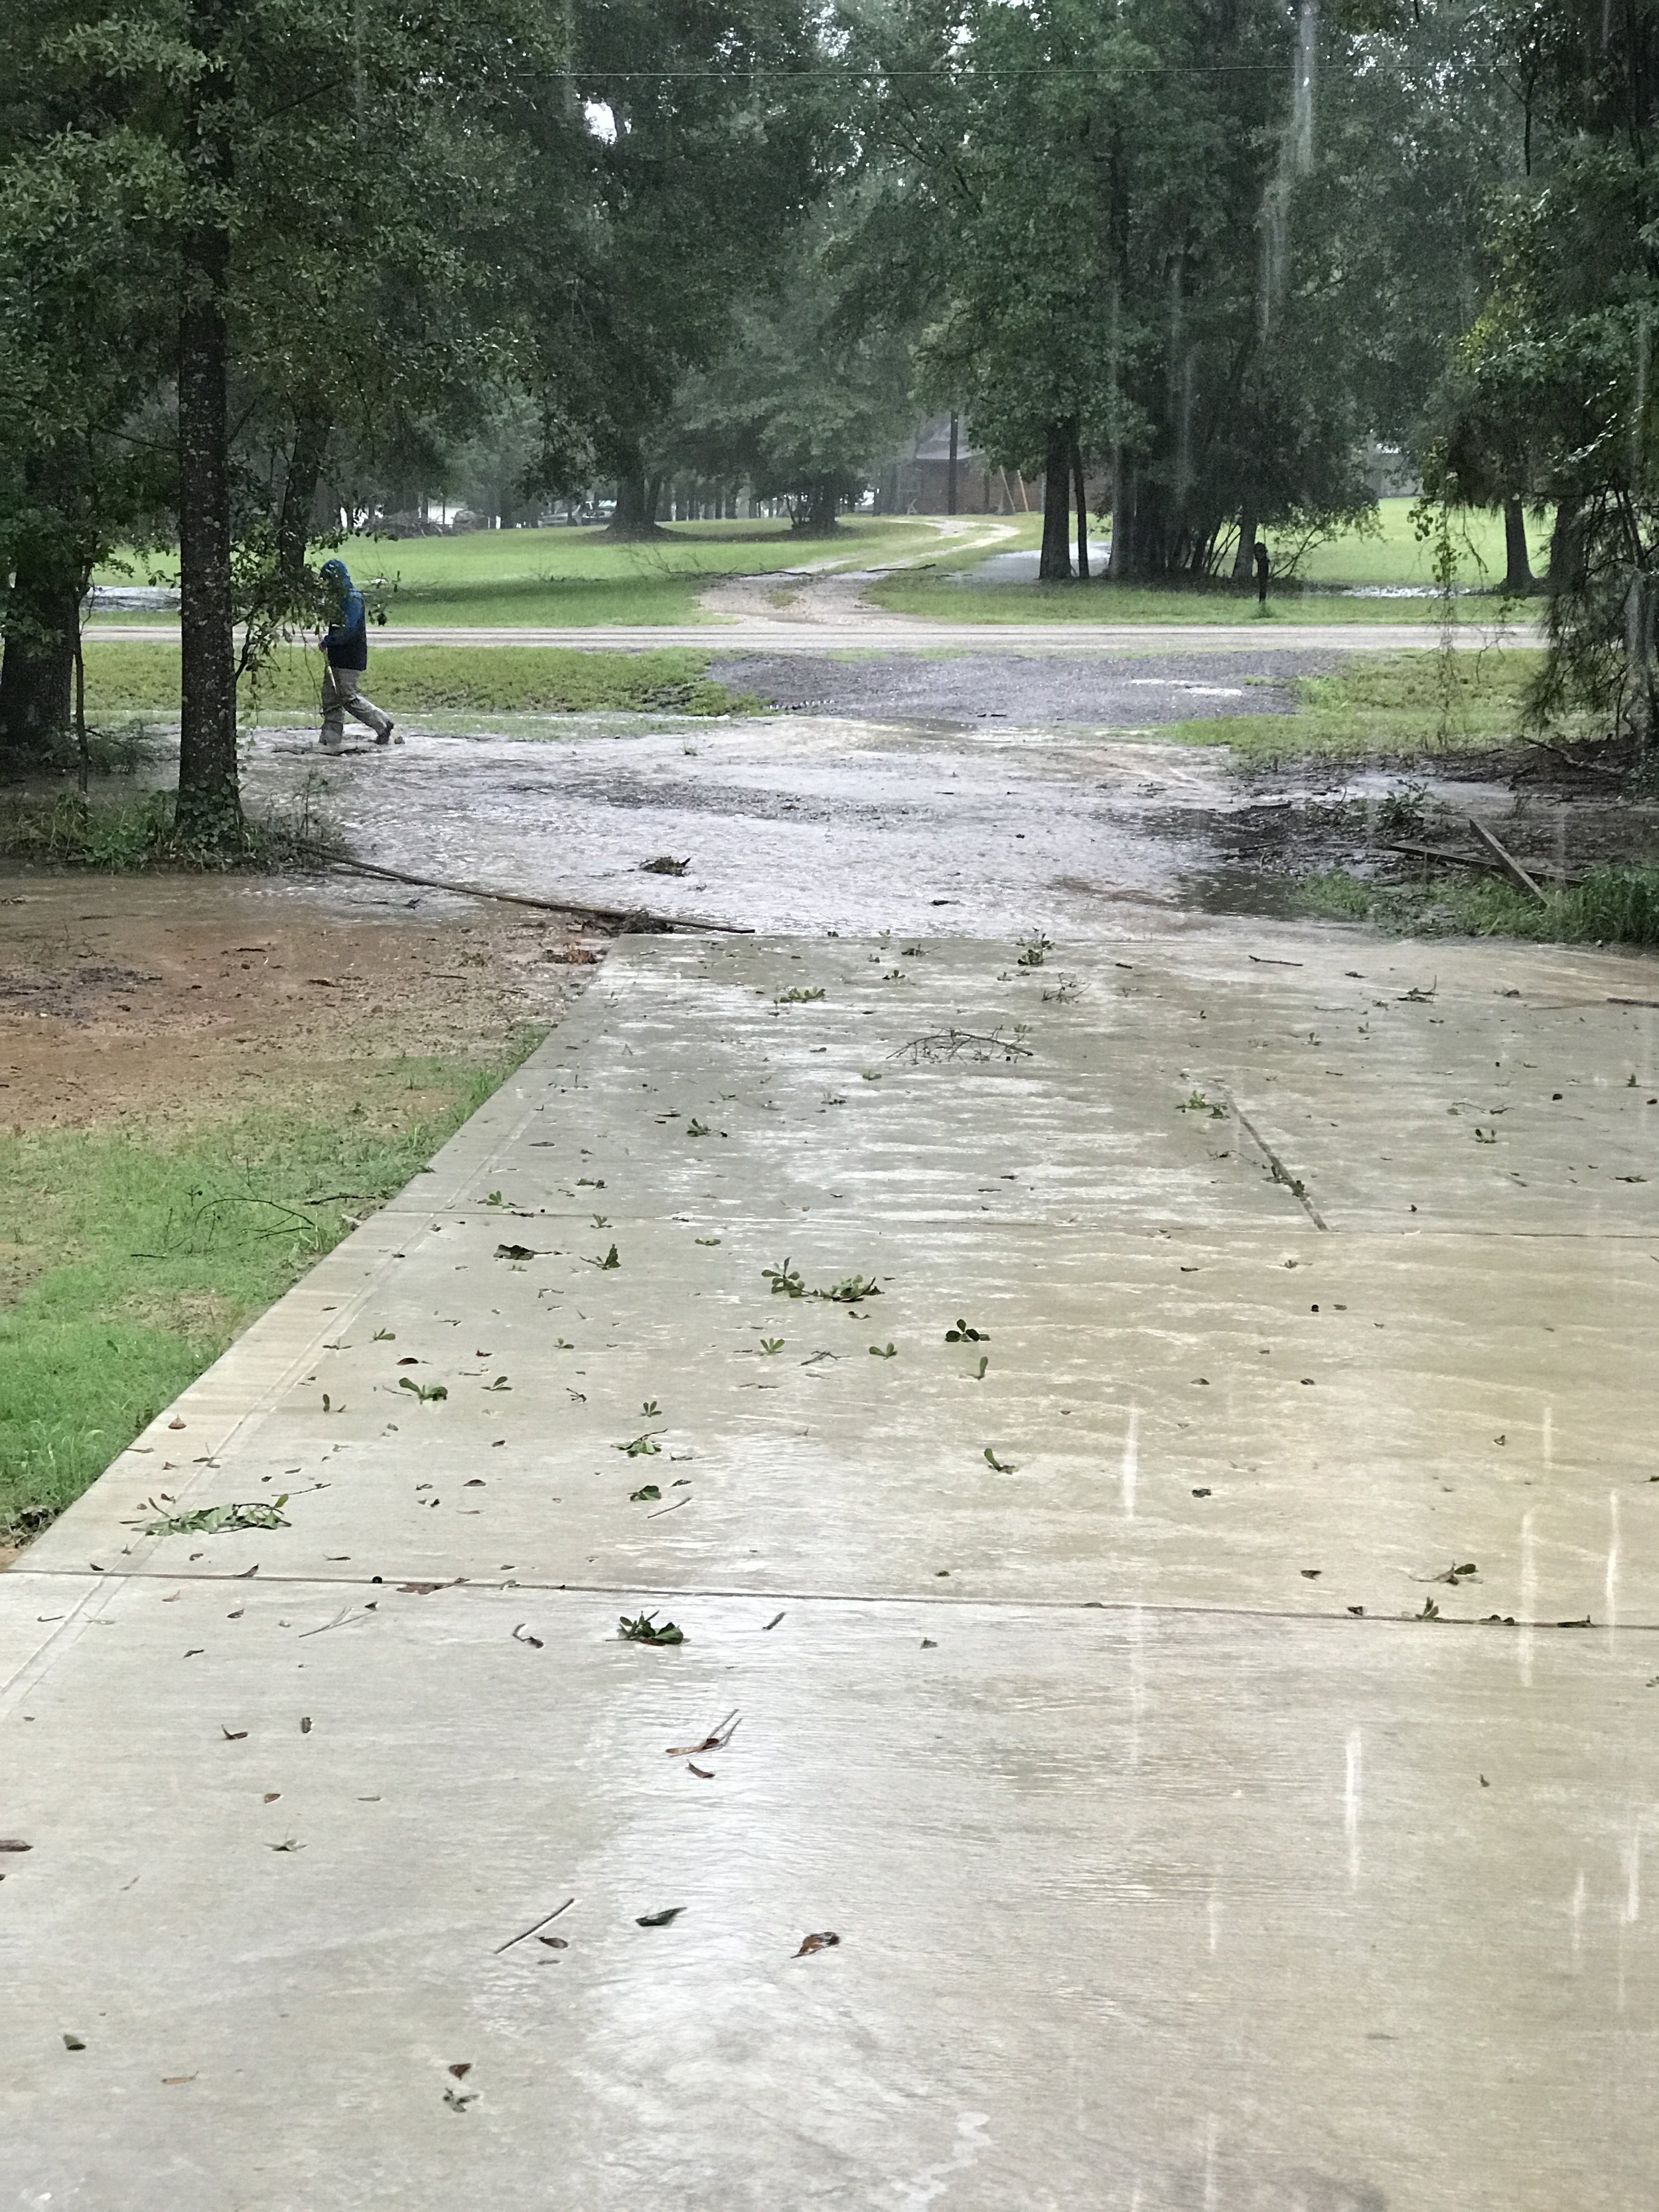
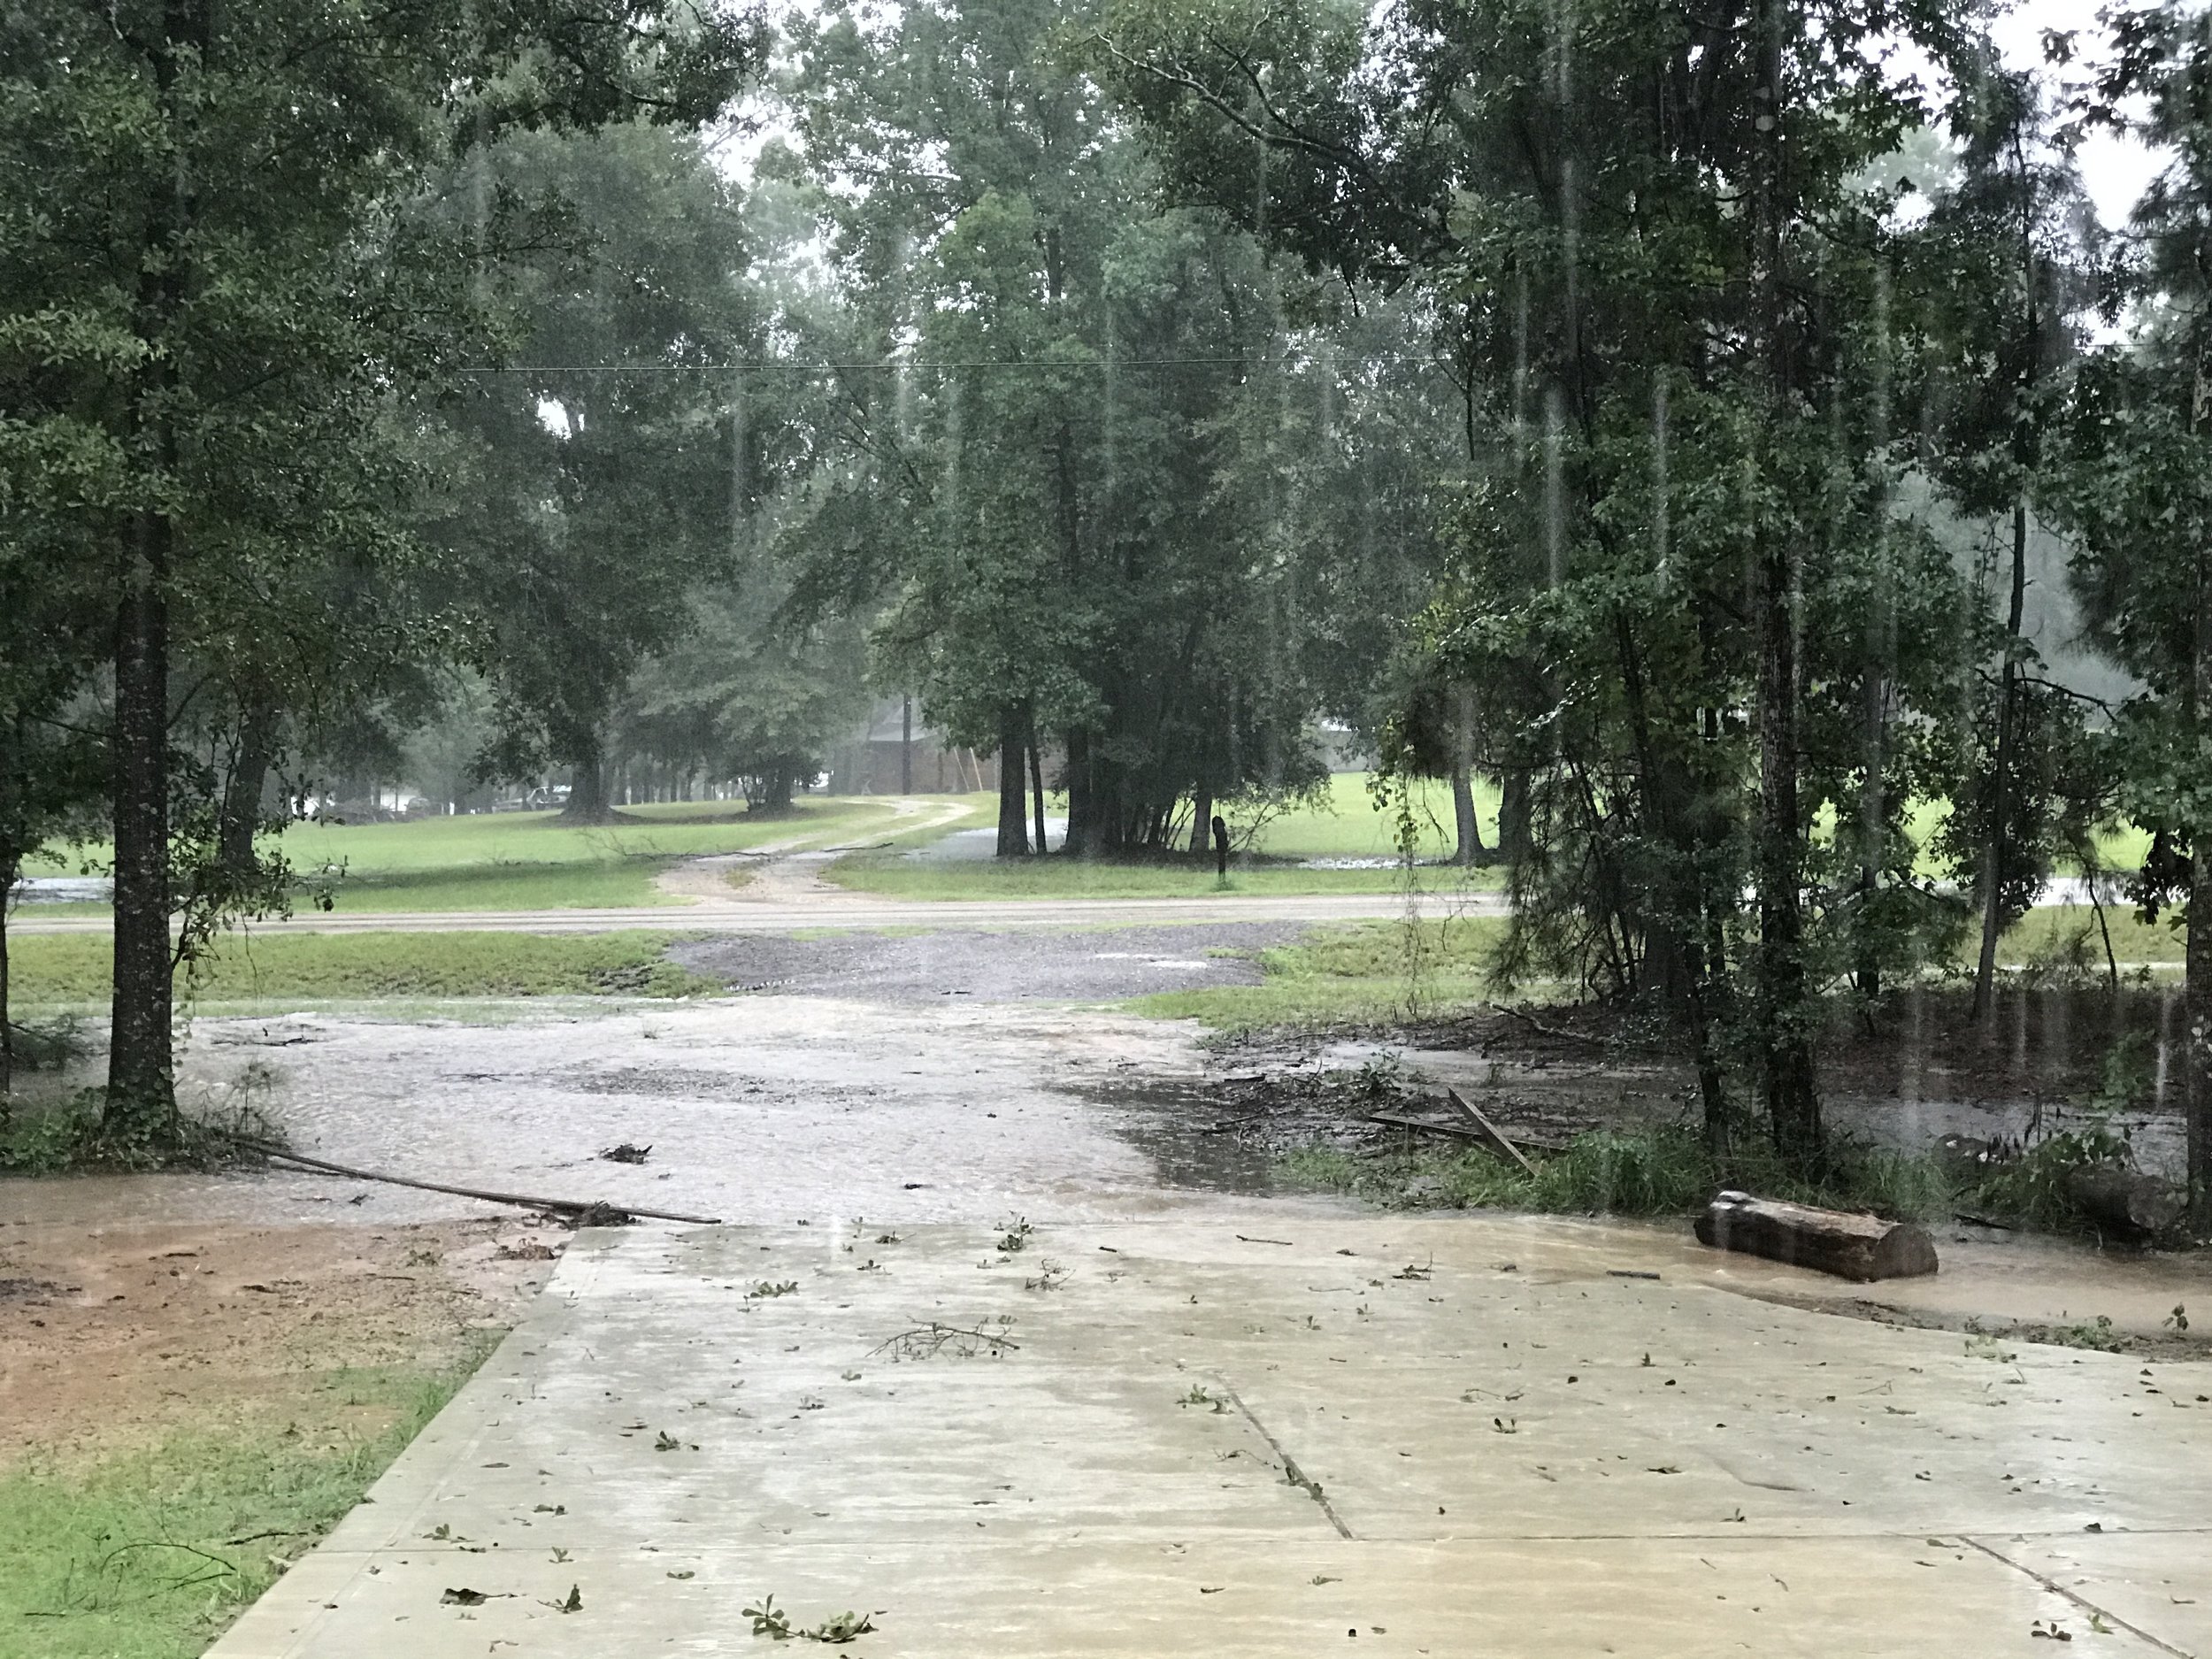
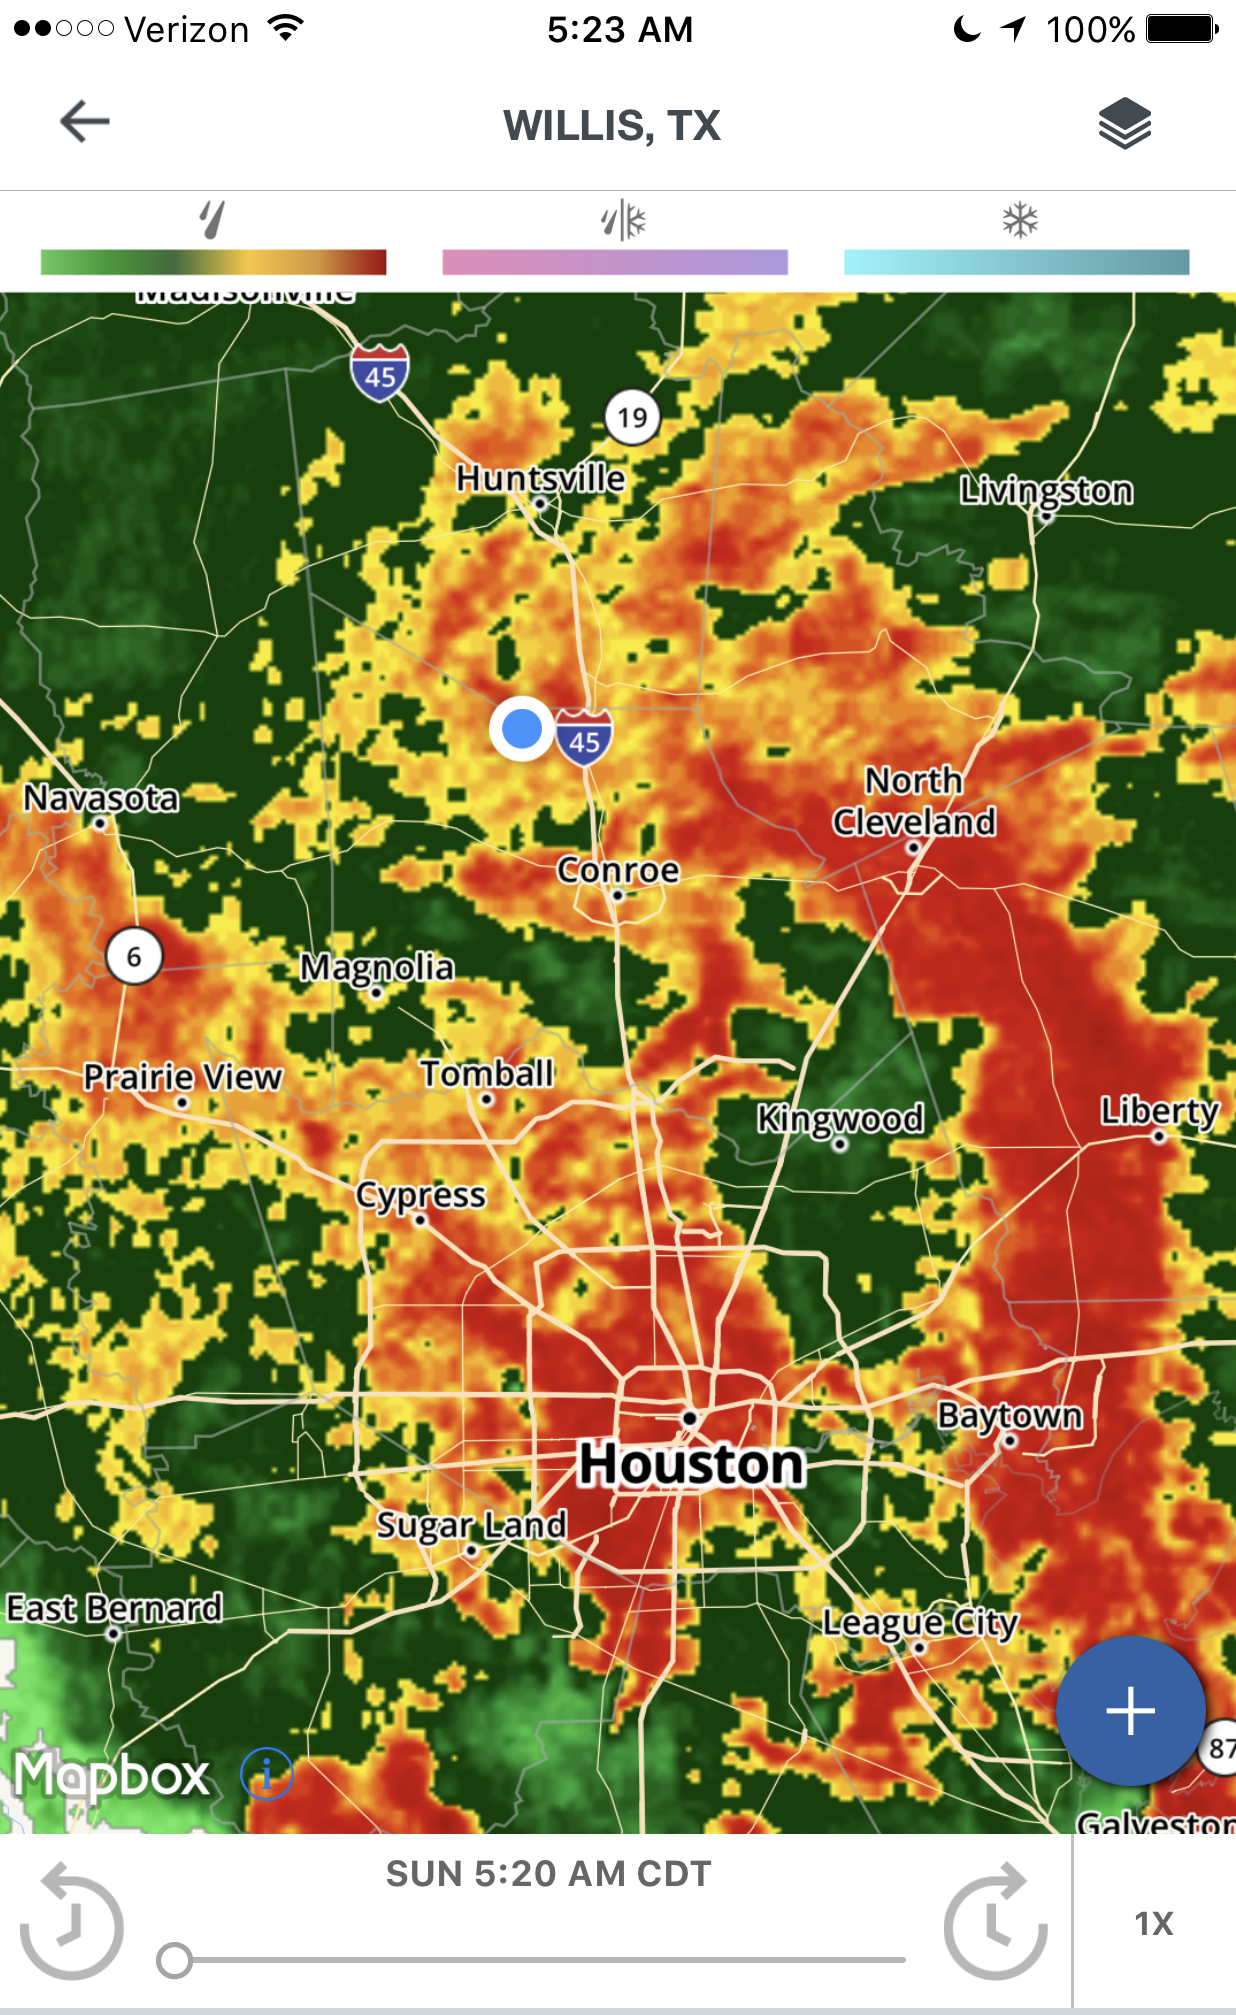
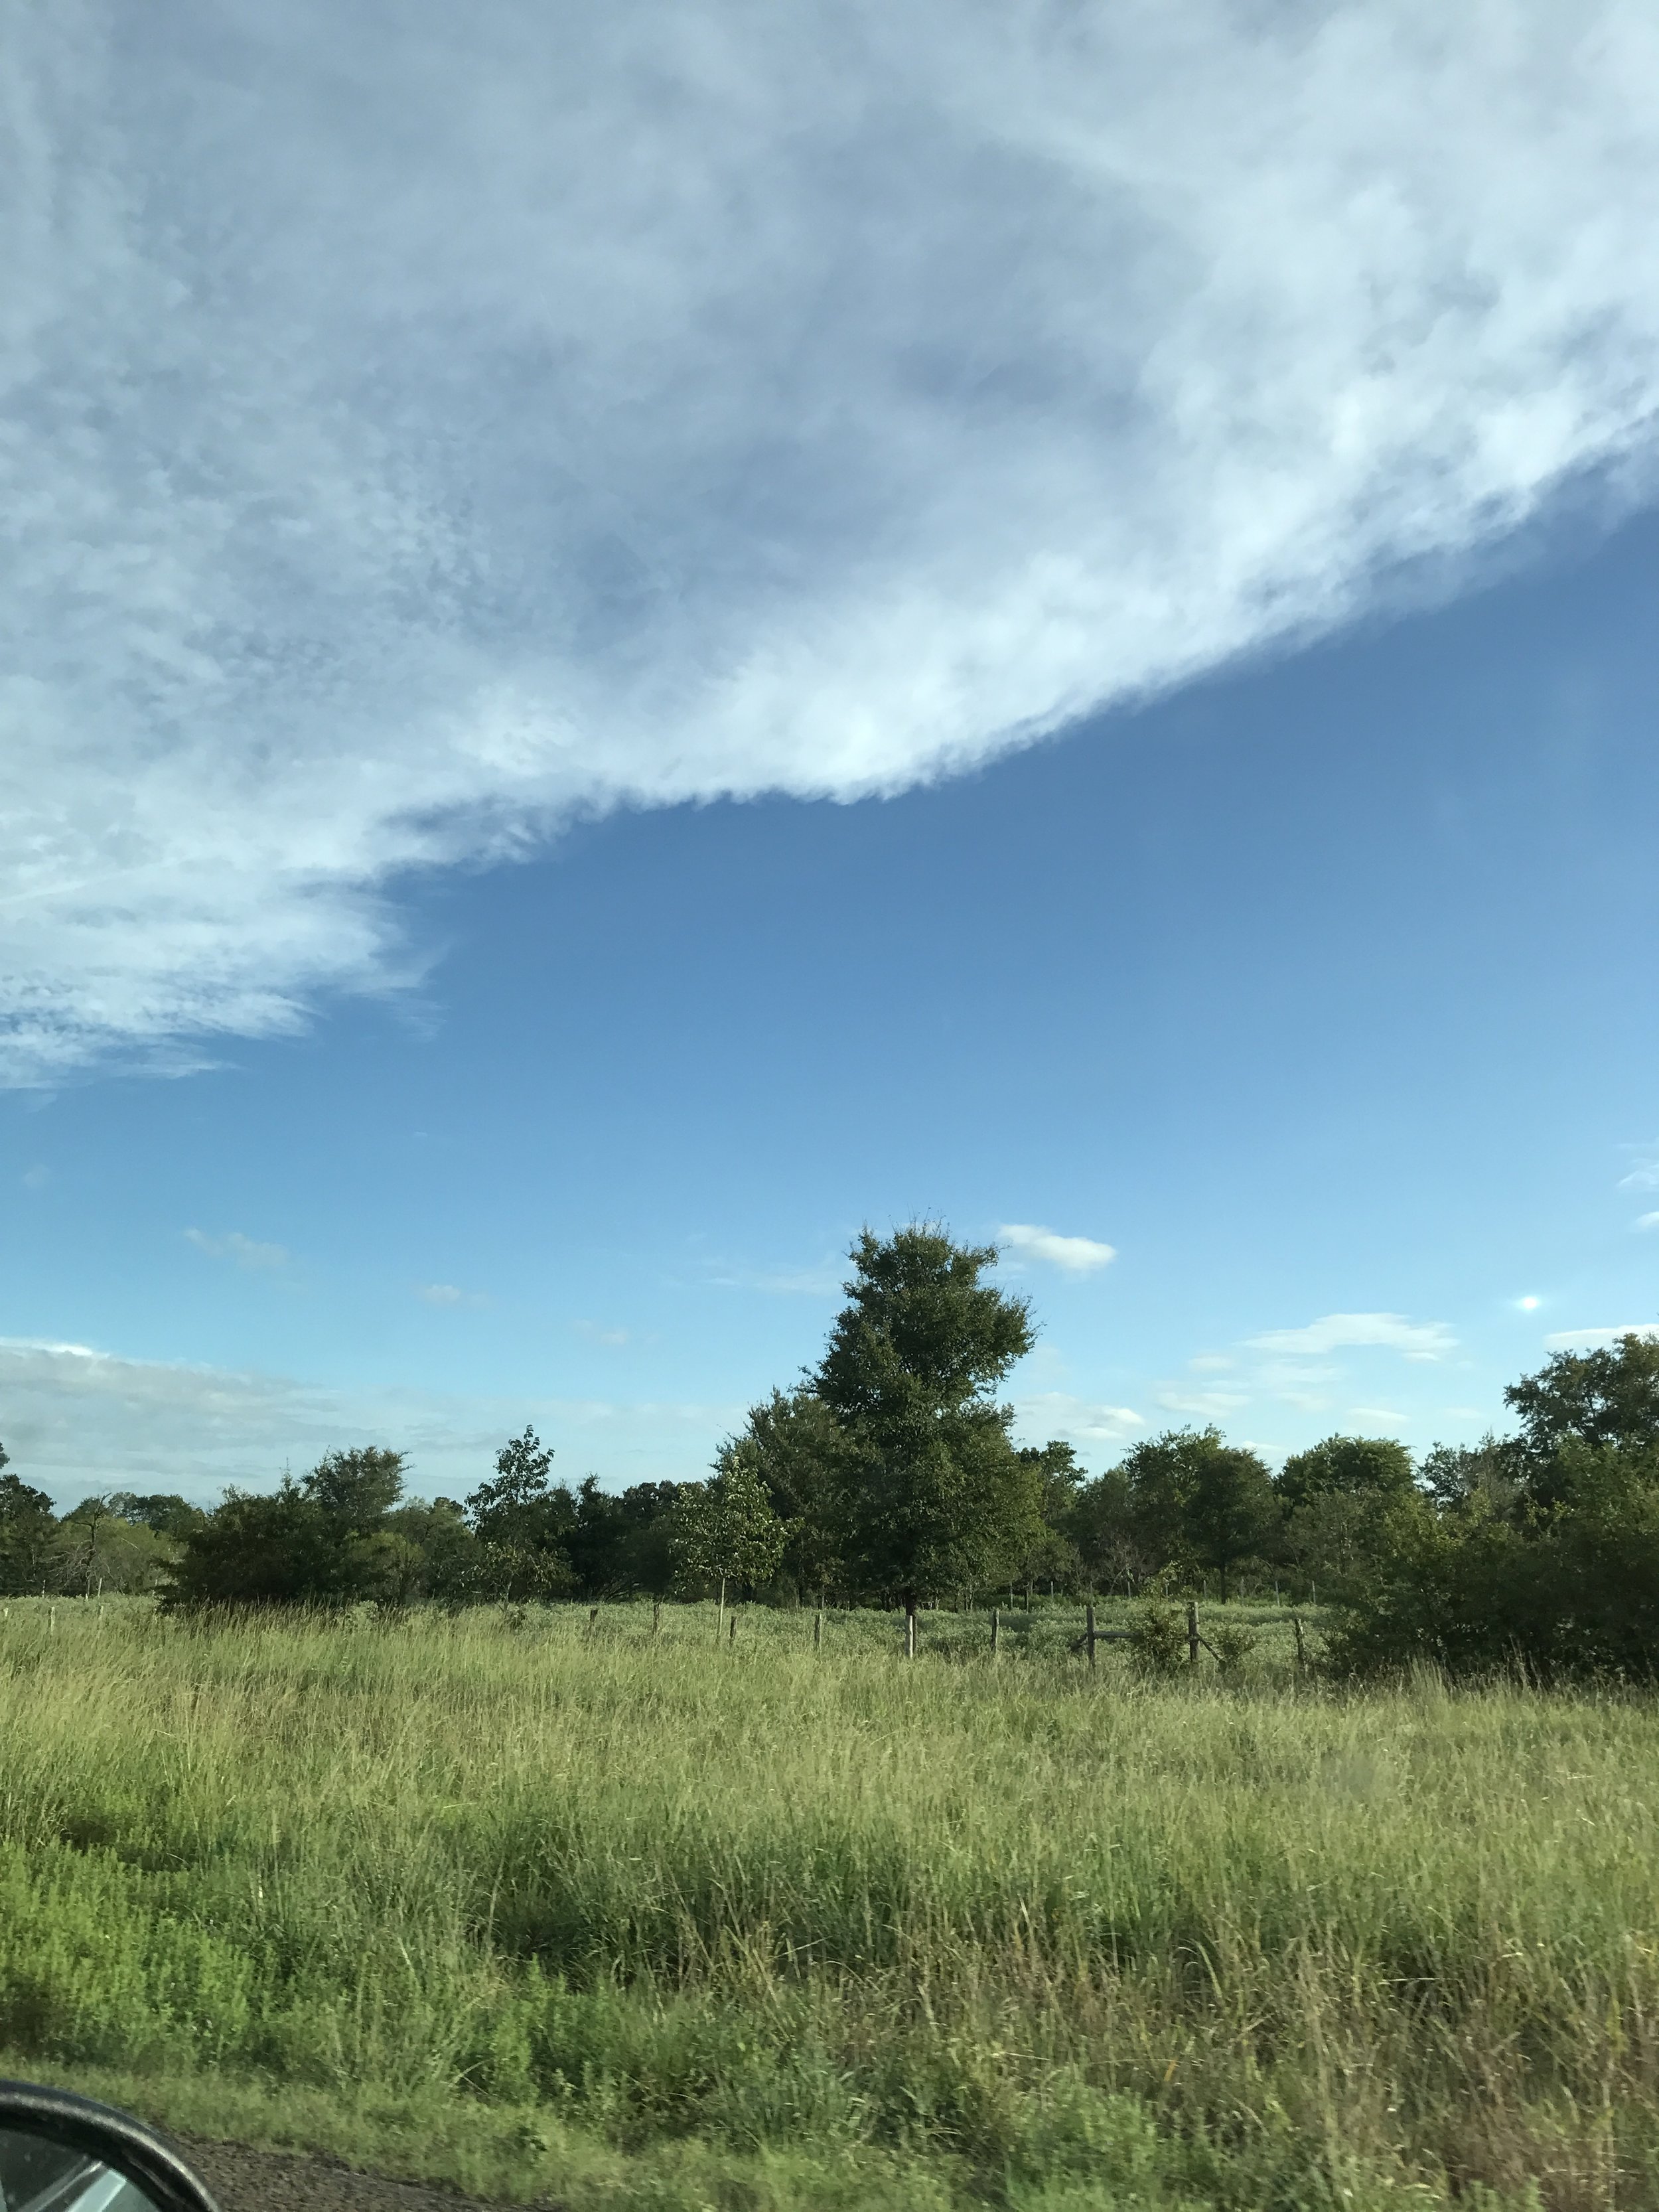
Through most of Saturday, it rained and rained and rained.  First lightly, then torrentially.

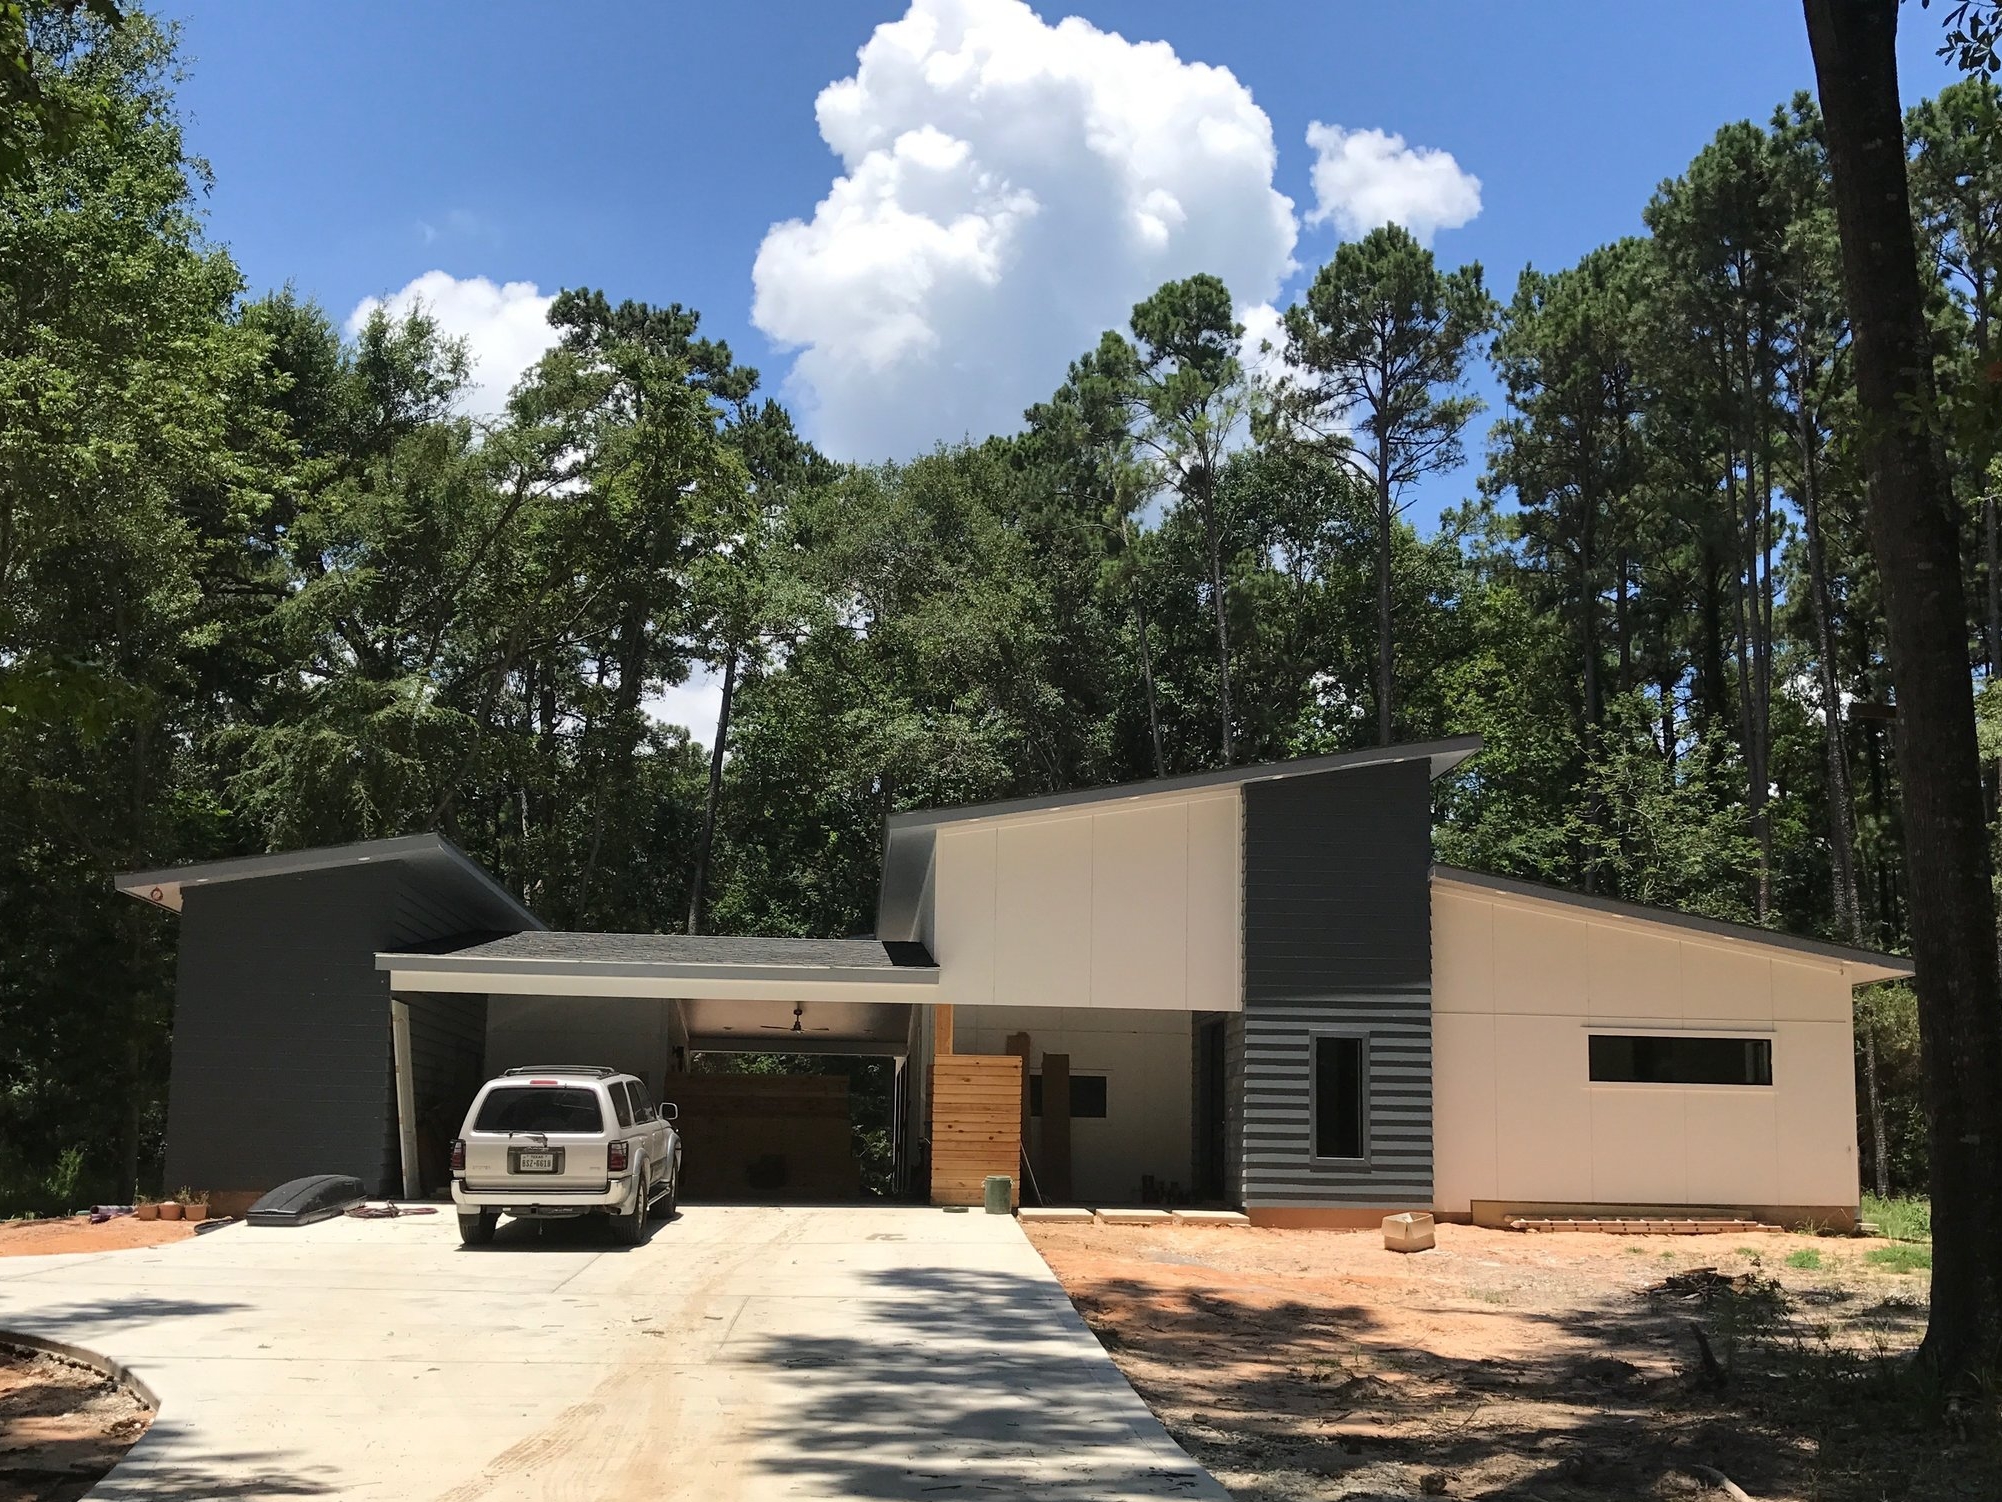
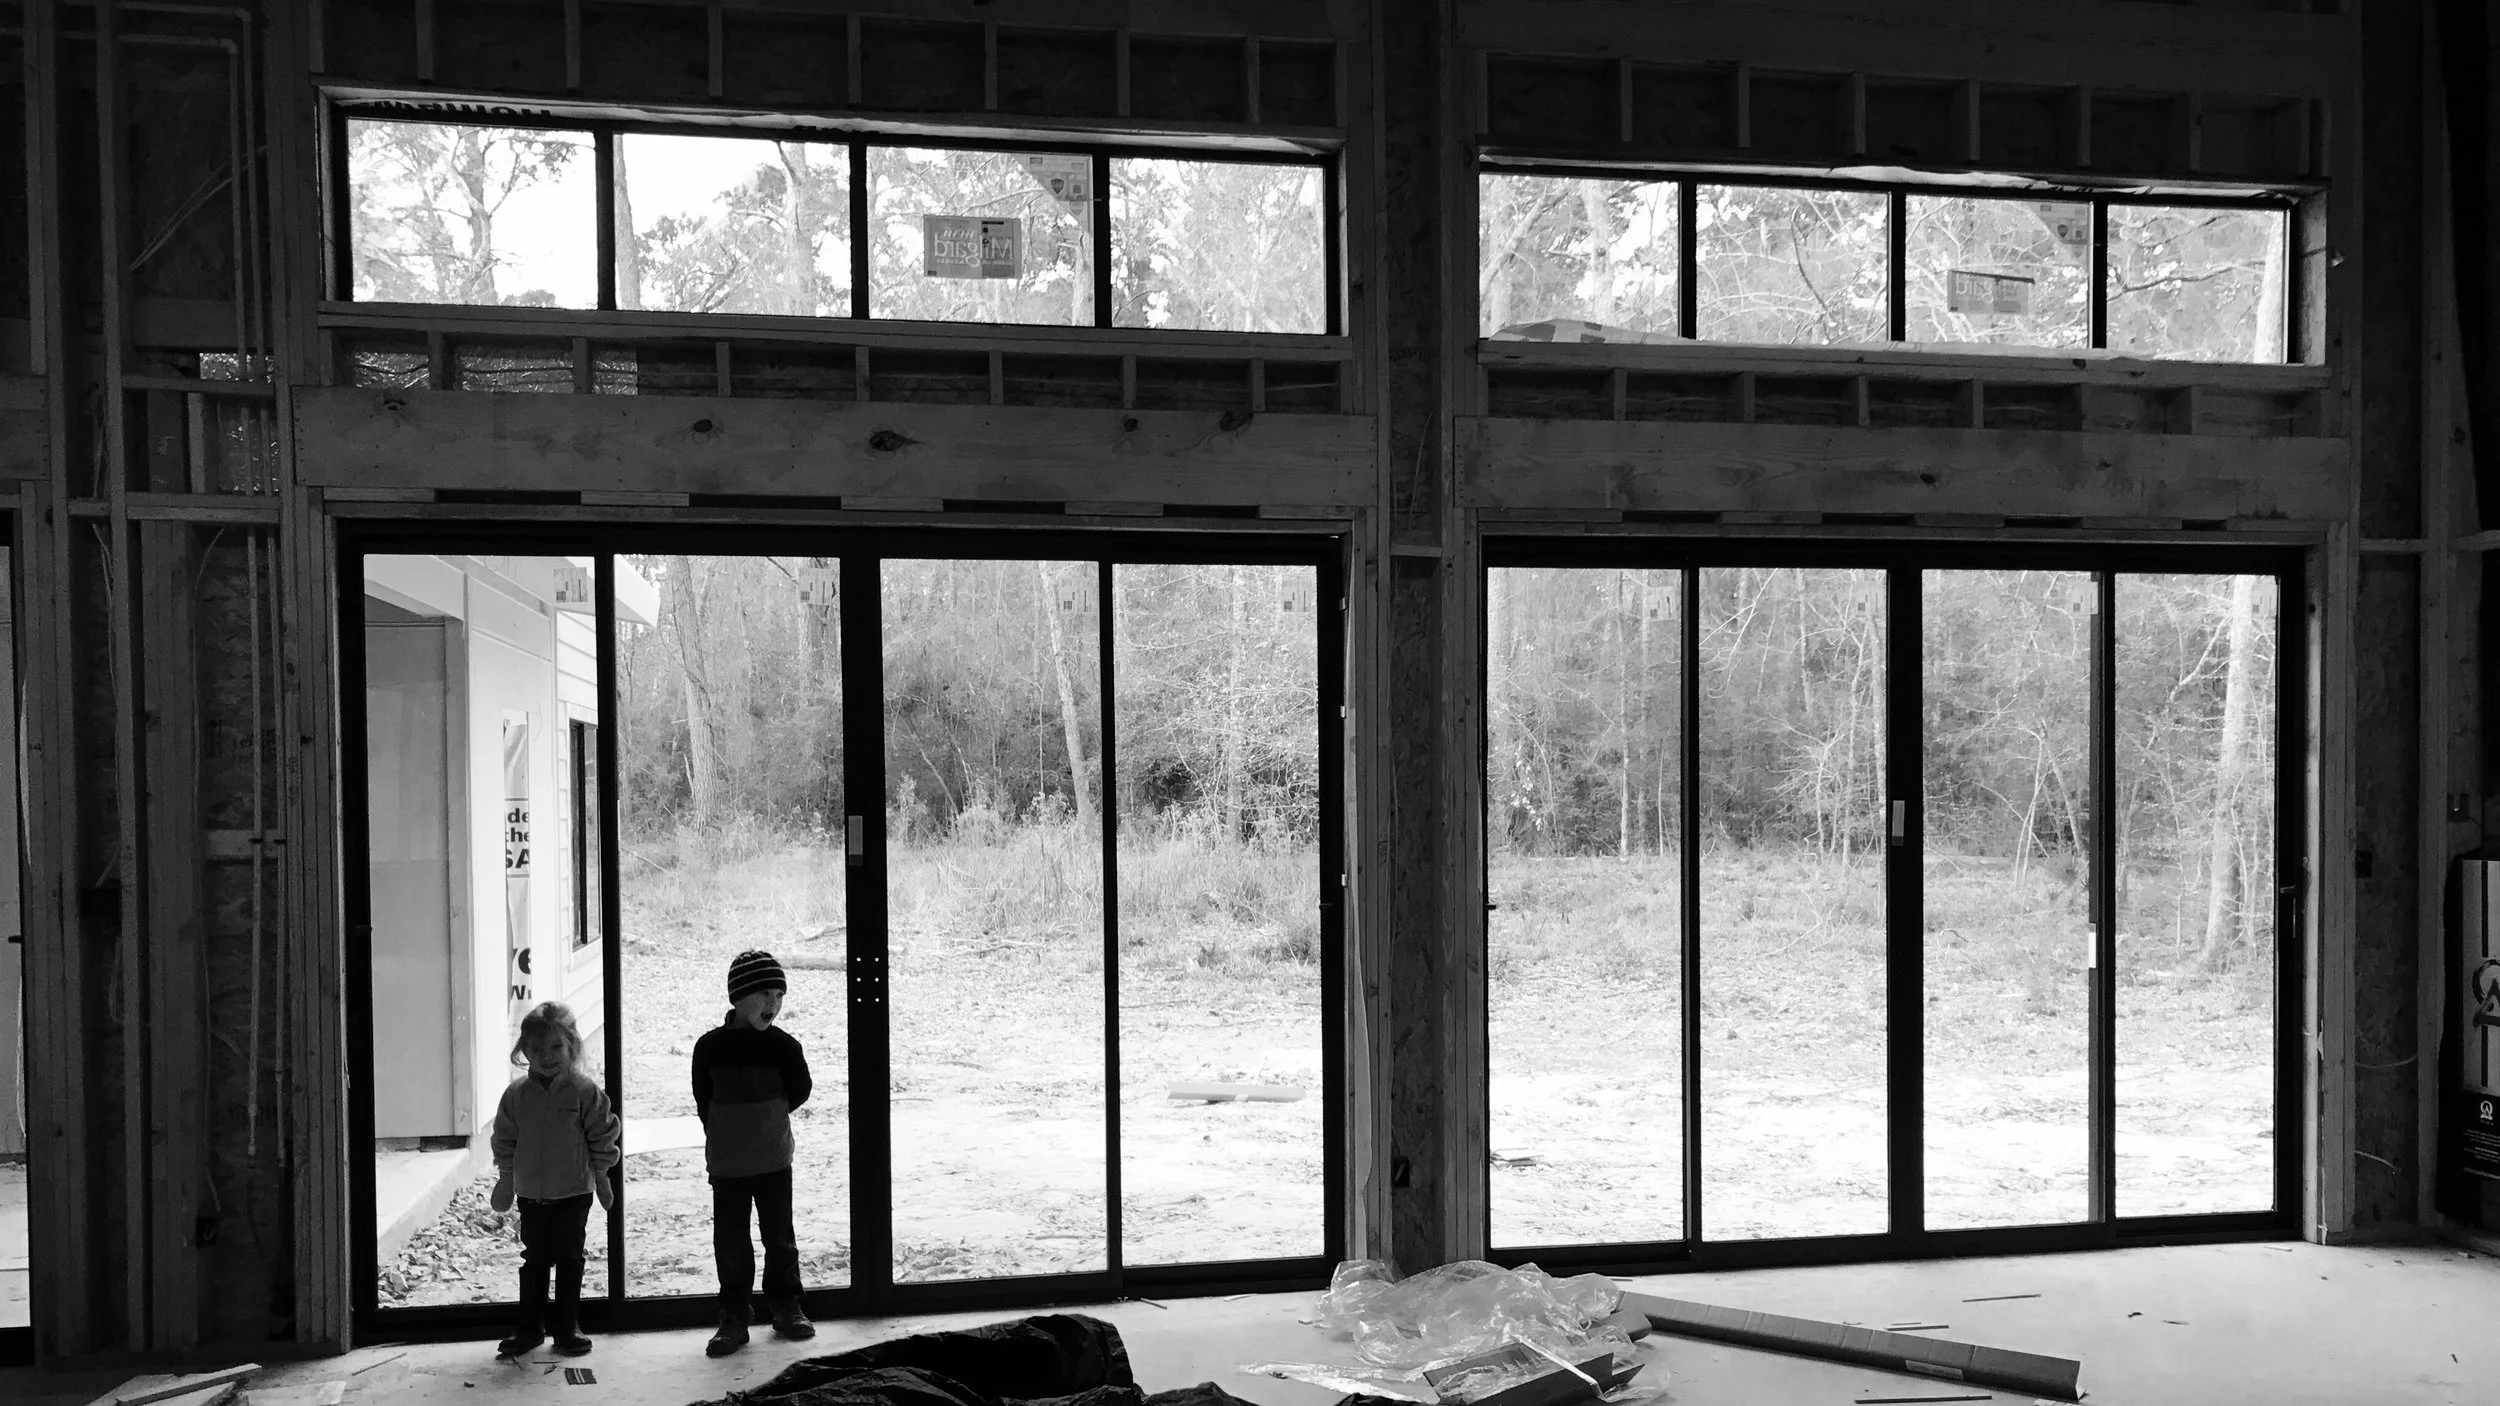
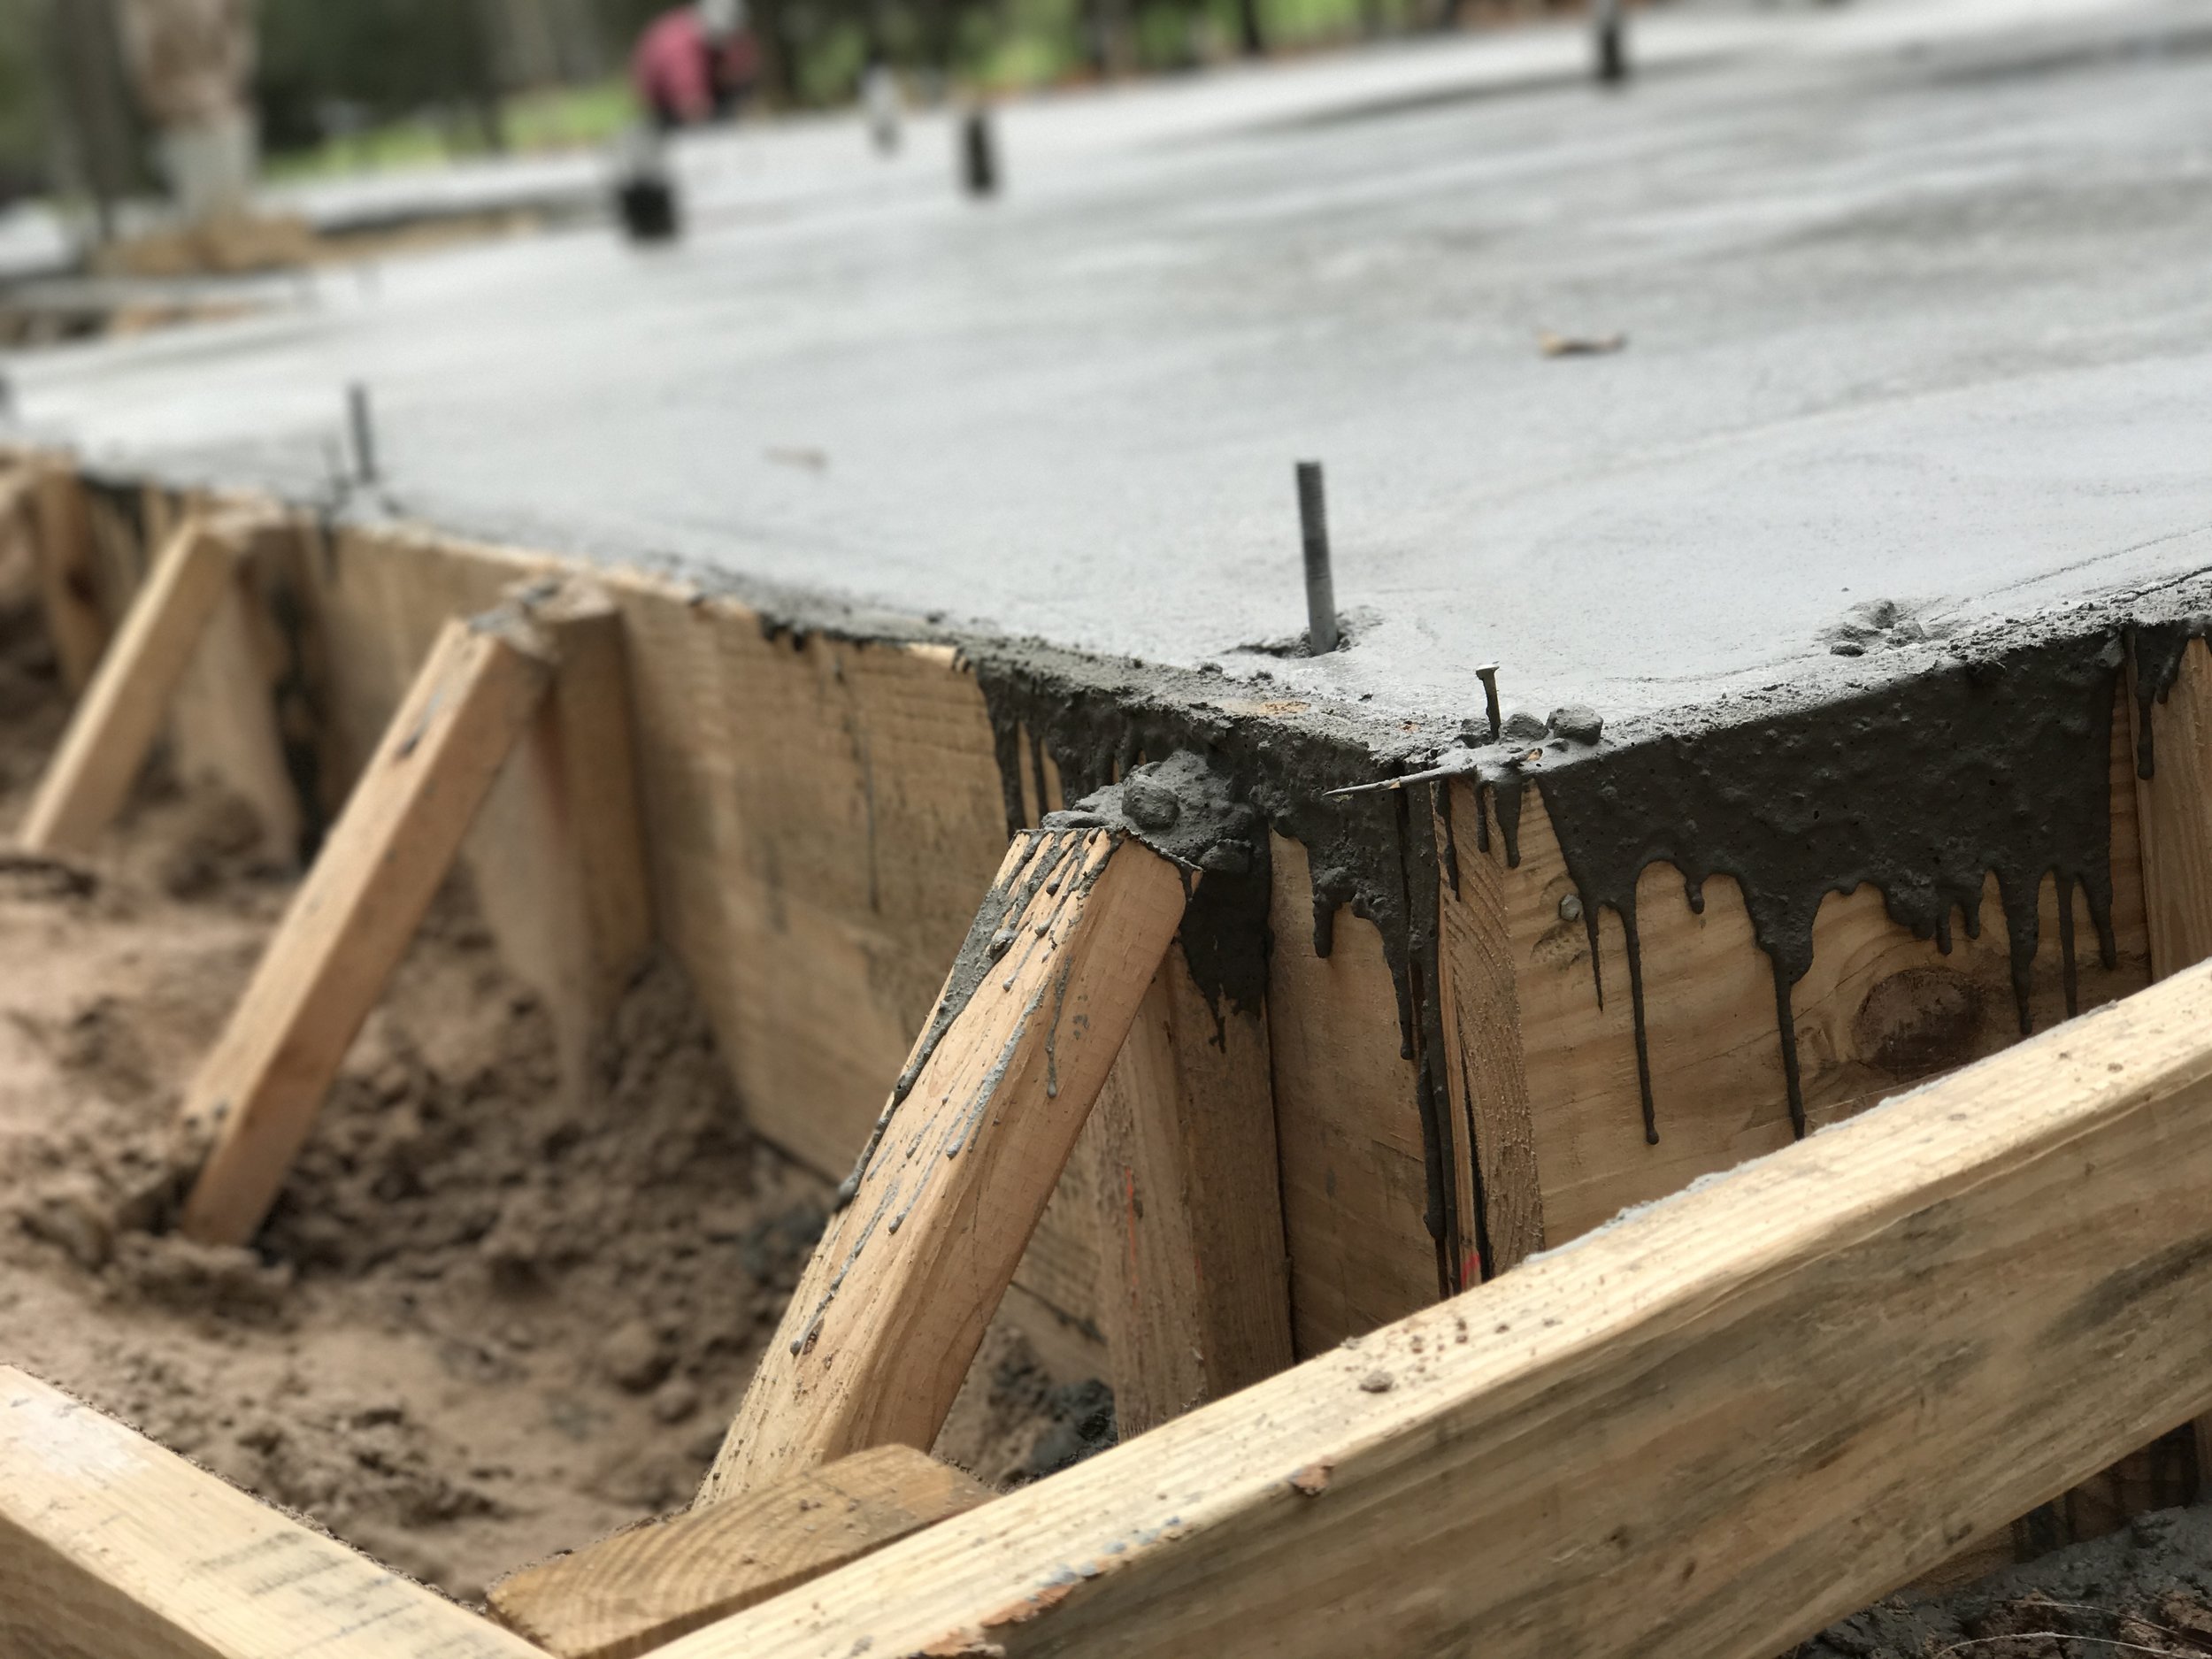
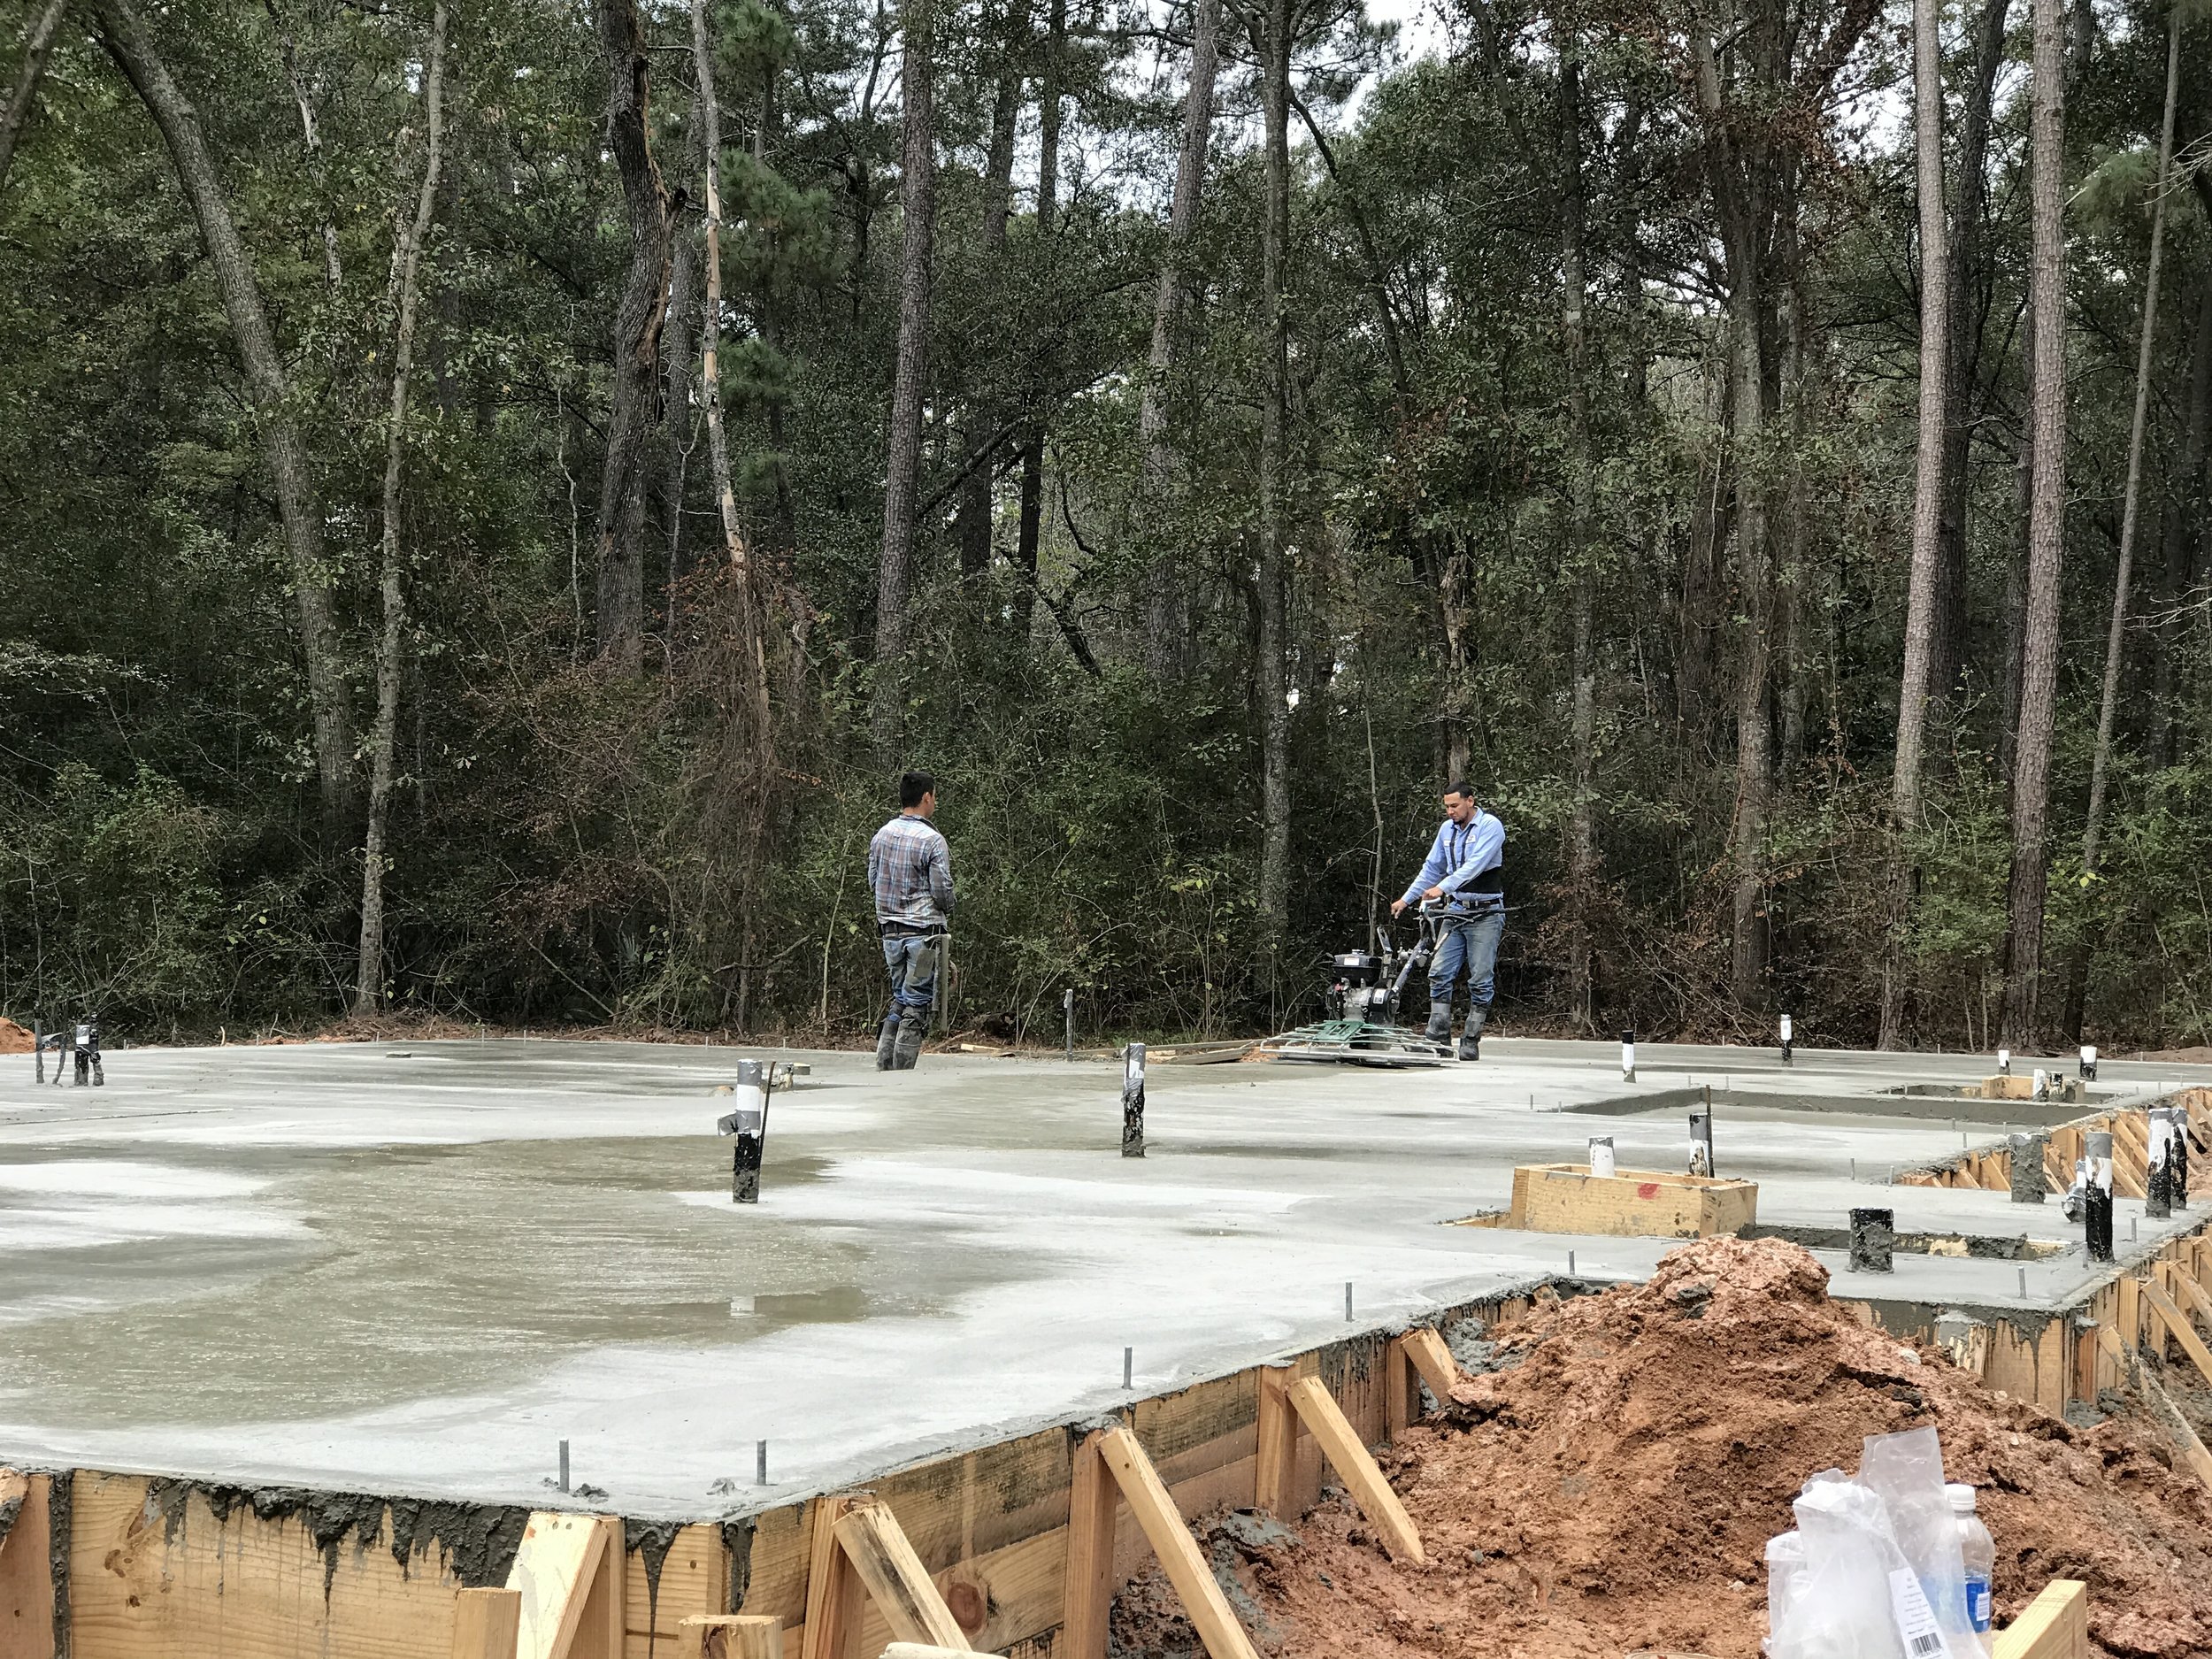
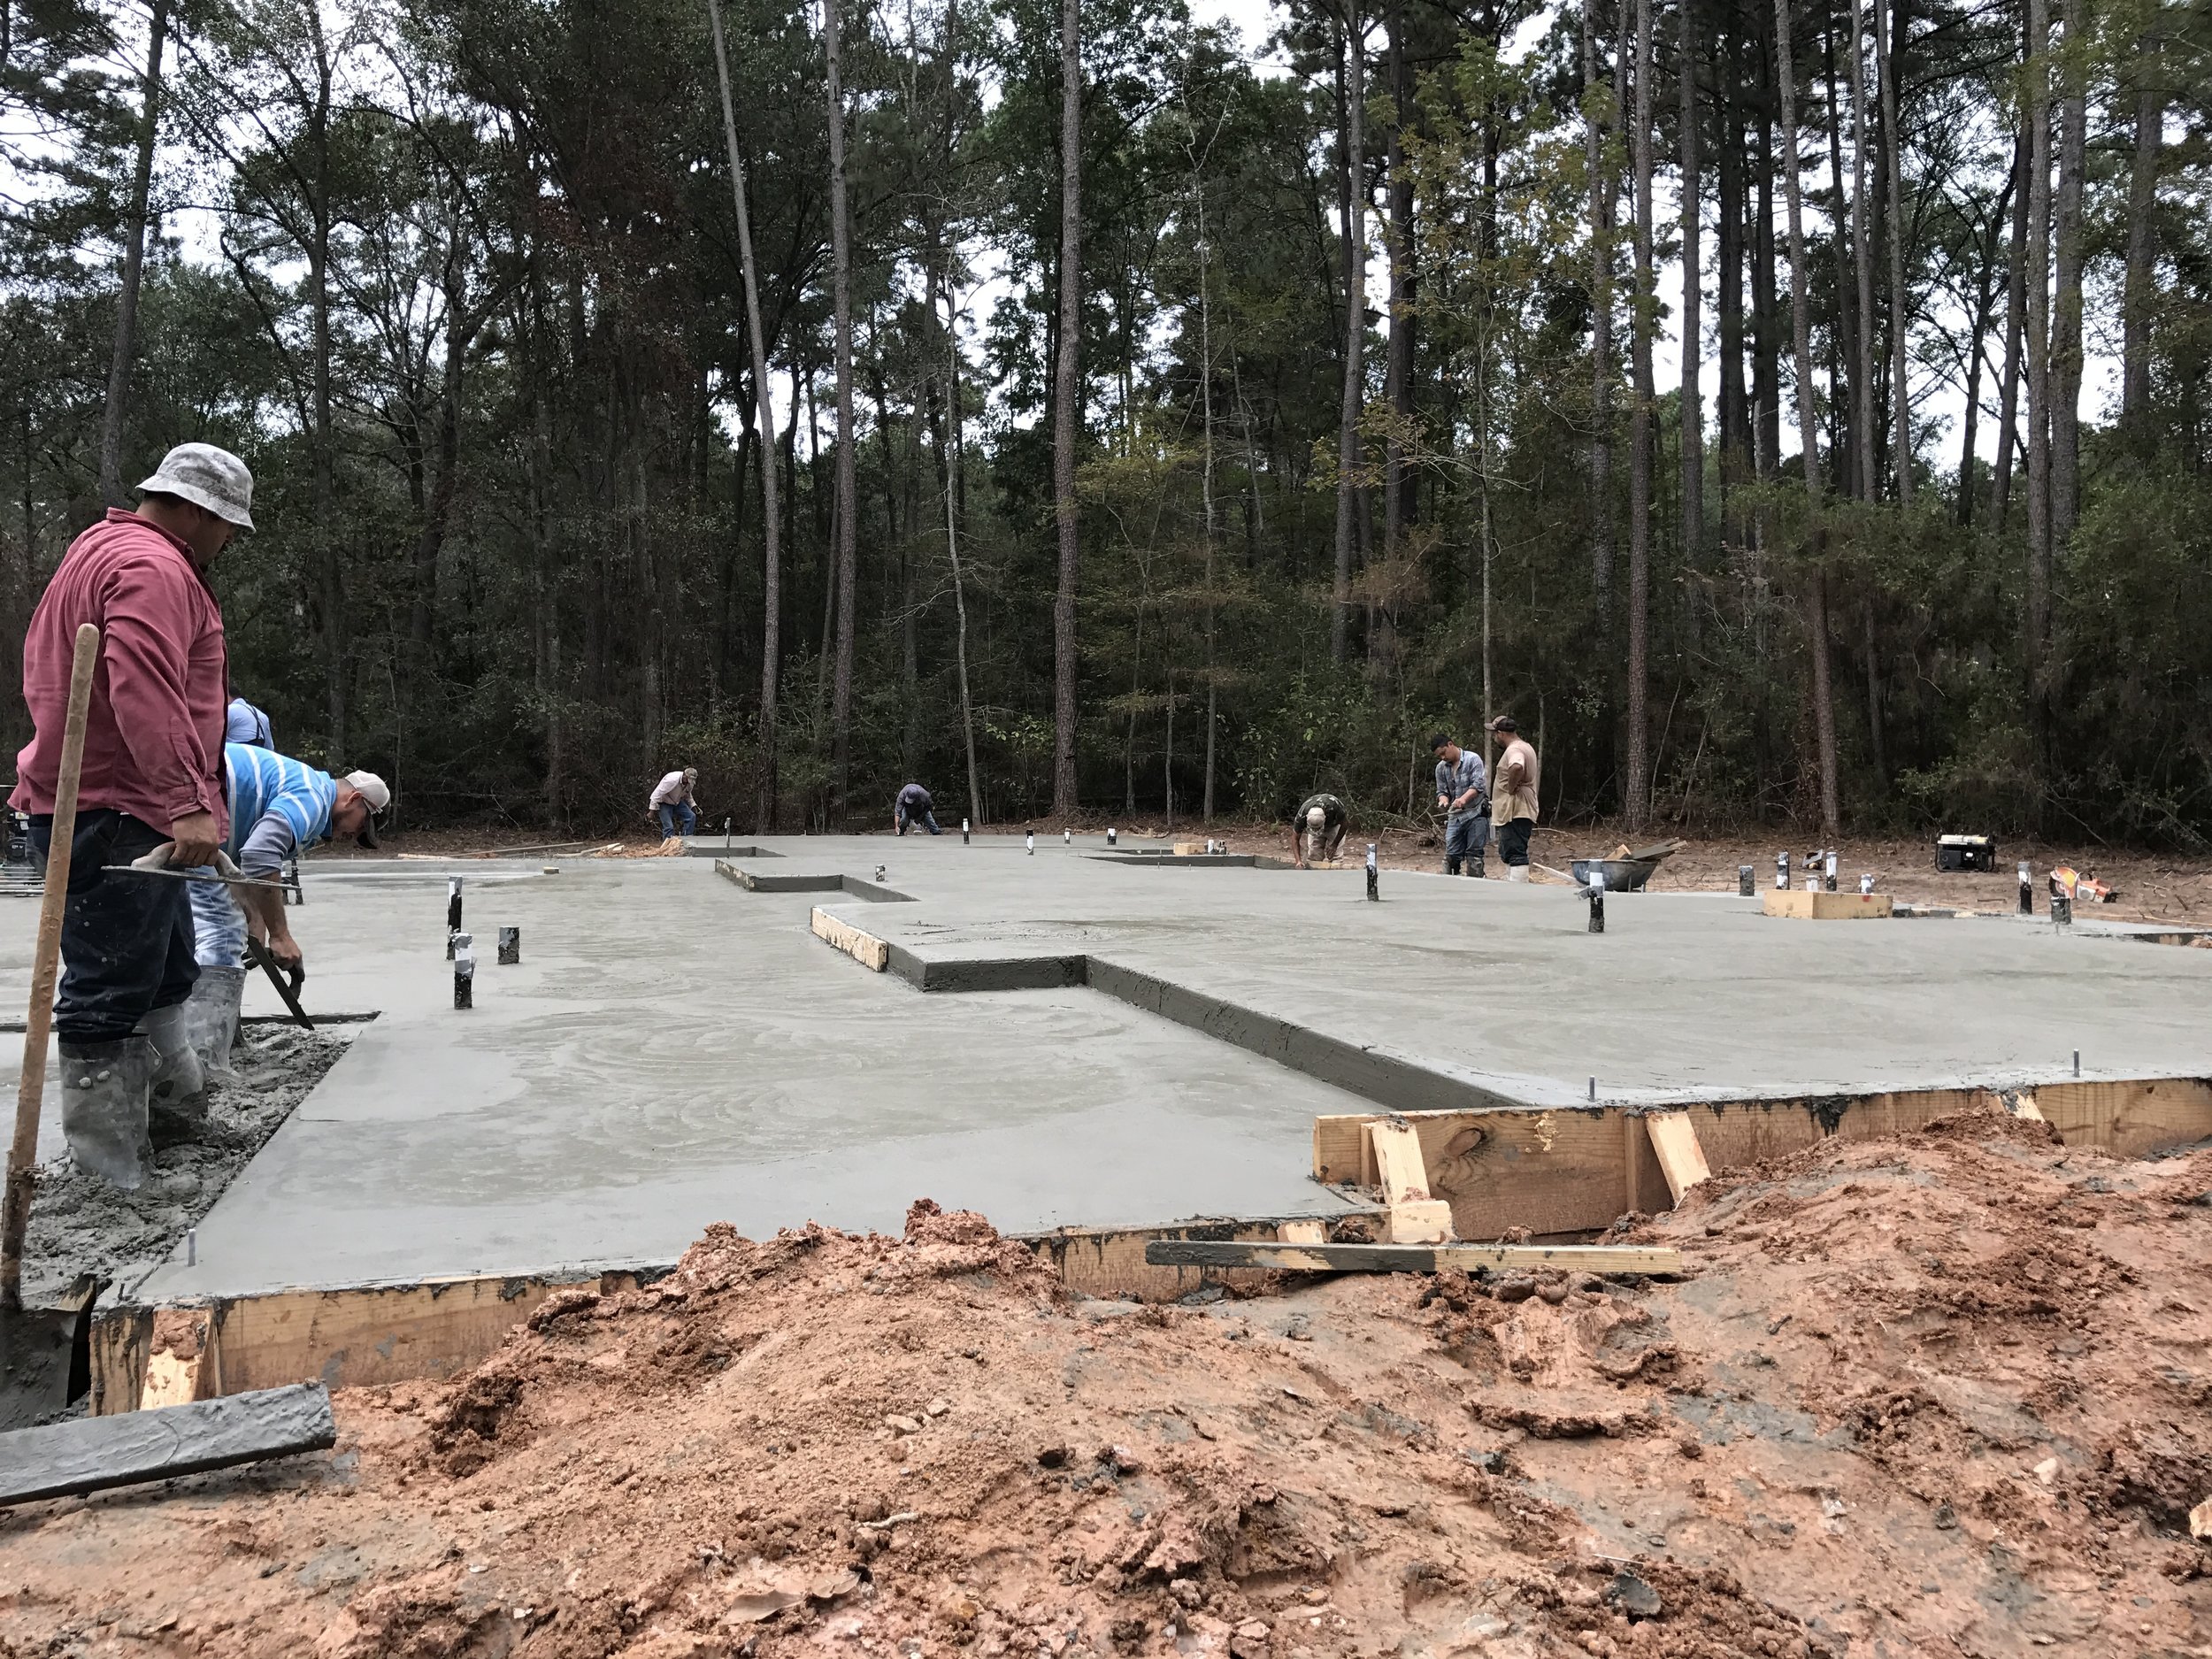
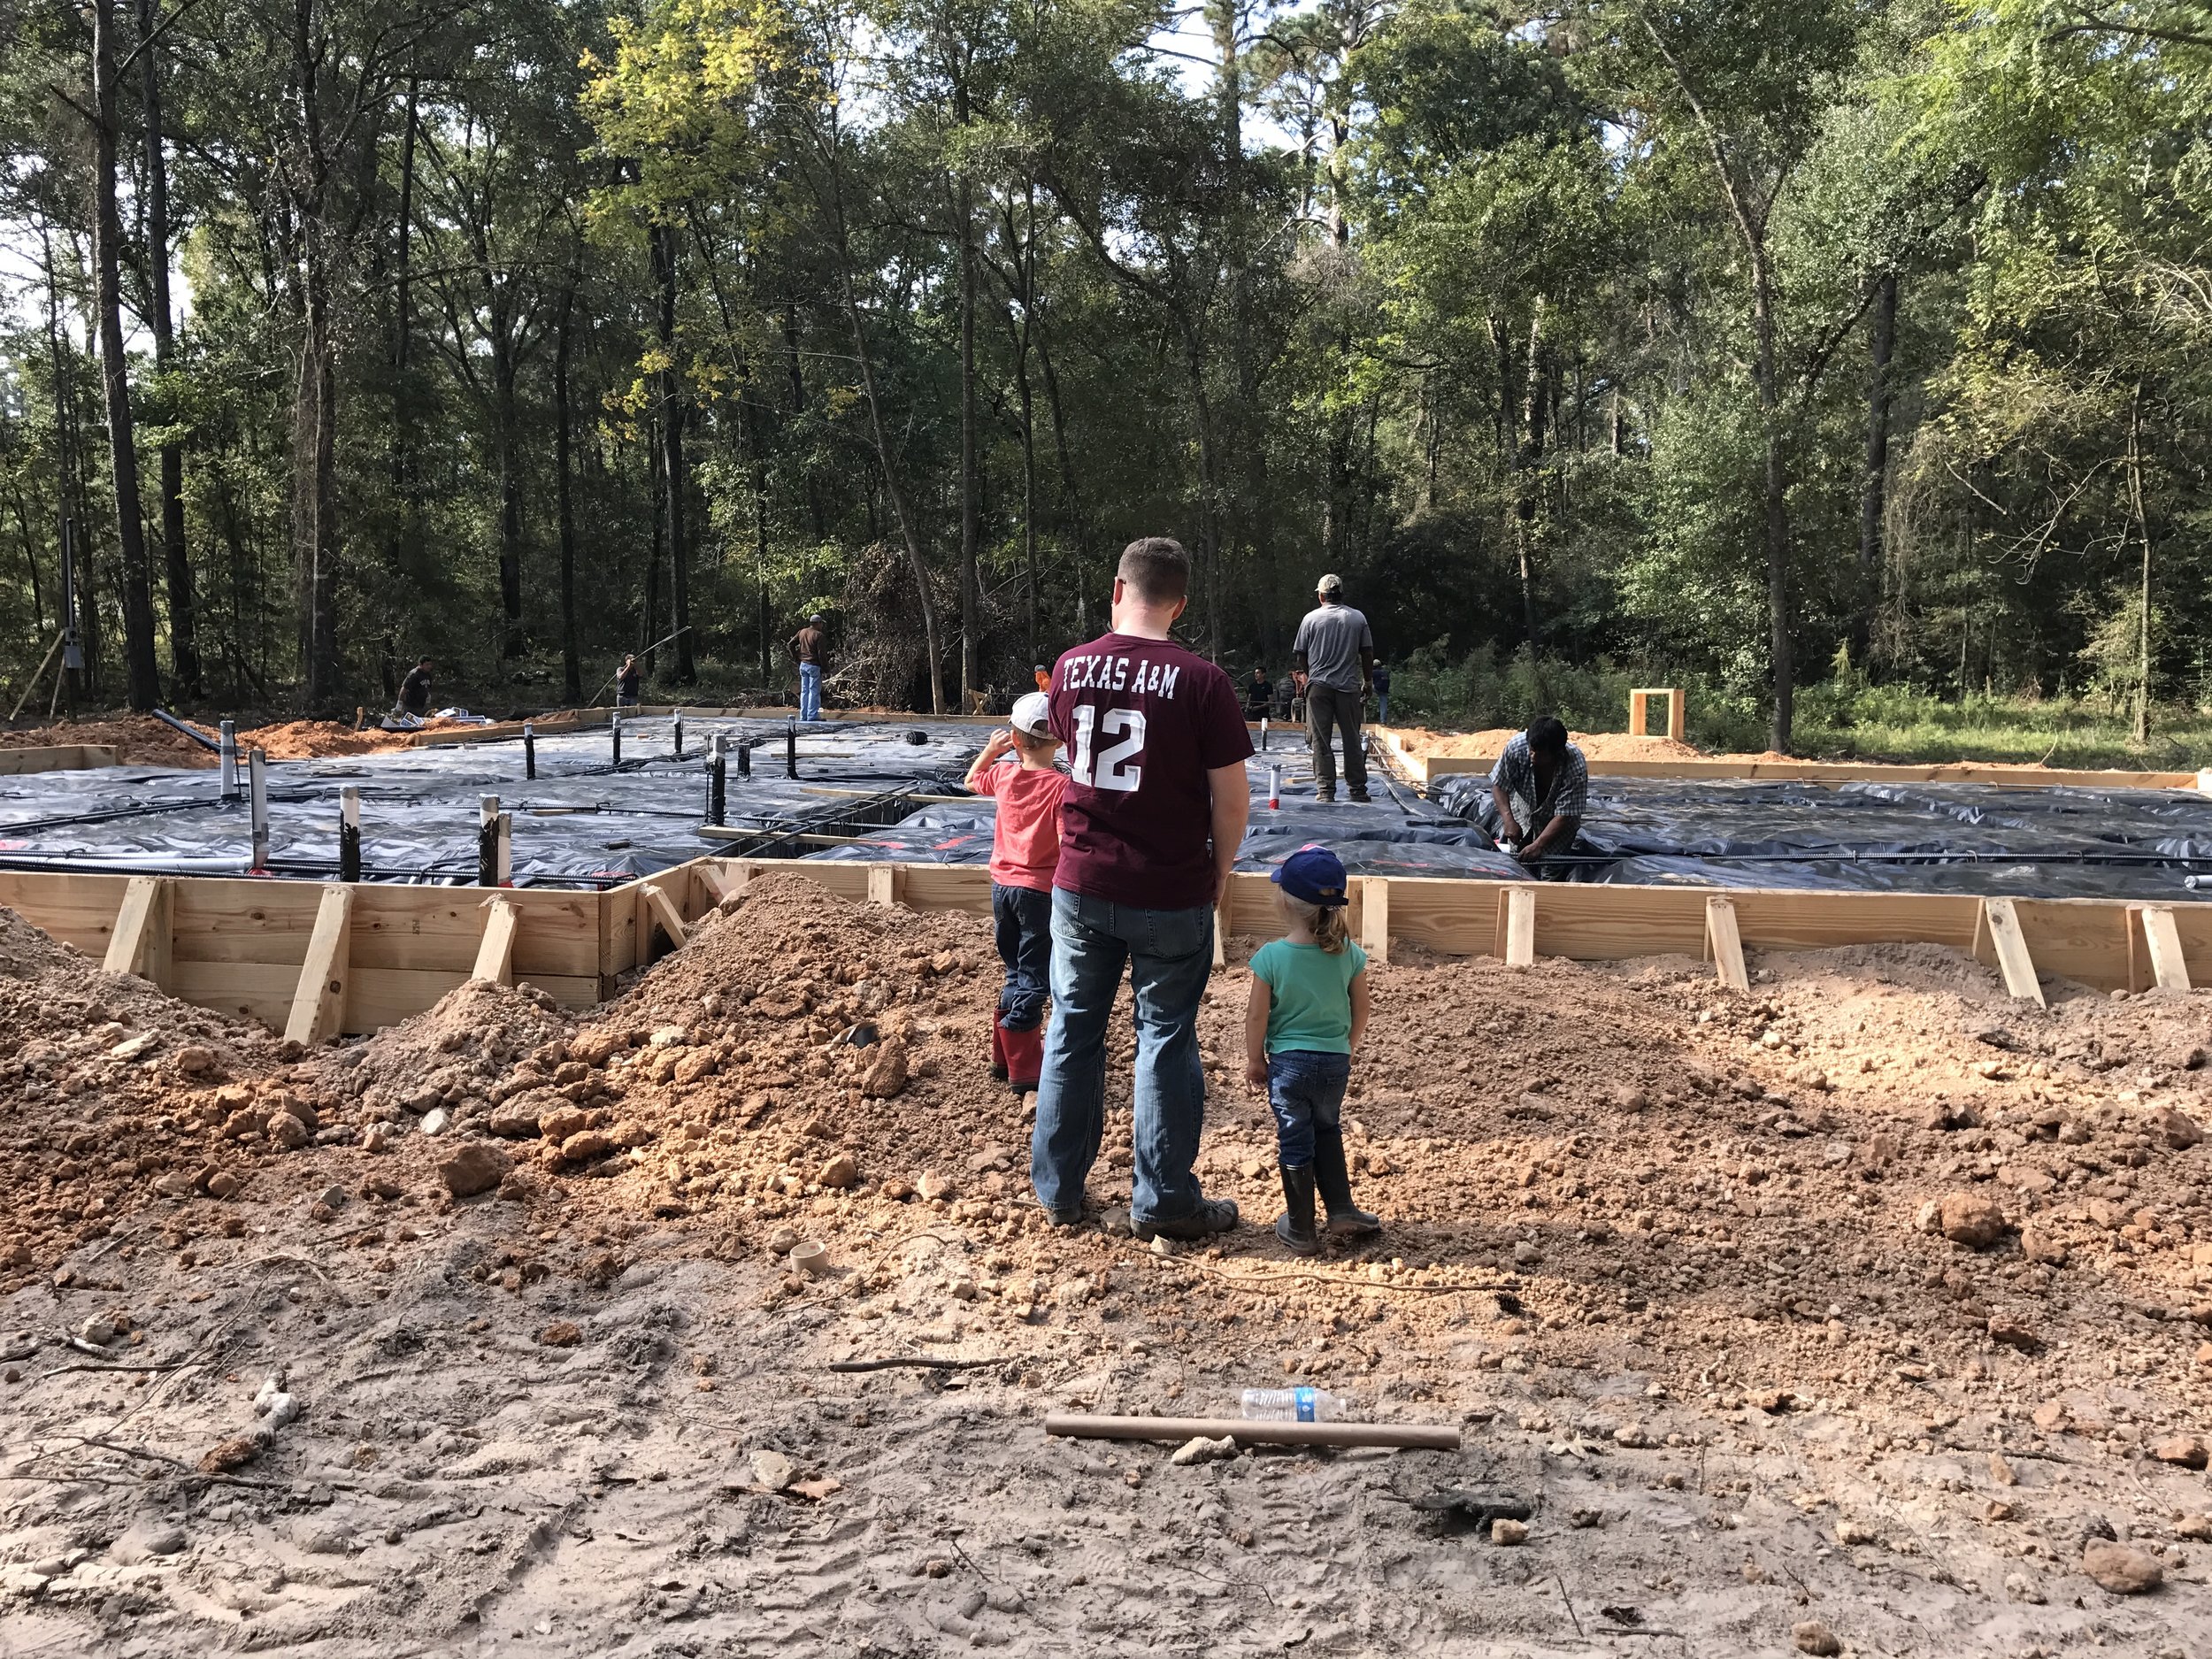
Our builder had come just a few short weeks before to do a final grade around the house and slope everything away from the foundation.  We were so grateful to watch the water gather and then flow in streams around us, far from the house, out to the street.  

The county had come the week prior,  proactively mowing and clearing the drainage ditches along our road and others.  During the downpours, Mark did some checking to make sure our drainage ditches had remained clear, but thankfully everything was flowing as it should out into the rising waters of our nearby Lake Conroe.

That night, there were thunderstorms so strong that the house shook.  In the early morning hours, the worst reached us.  We stayed up to watch for tornado warnings in our area.

Many in our community along the lake shore experienced flooding from the rising waters of Lake Conroe as it swelled by almost 6 feet.  Enough to threaten the integrity of the damn.  Controlled releases into the San Jacinto River at the south-east end of the lake added to even more flooding downstream.

Our road out had become impassable on Sunday.  All we could do was wait for the waters to recede and watch the news coverage as friends were escaping their homes on inflatable rafts.

Sayonara, HaRvey!

We had been planning a last minute family trip to Mexico the following week.  The airports were closed and it was uncertain when they would re-open.   We needed to update passports for our littles, but we were unable to keep our scheduled appointment at the Houston Passport Agency in the midst of the storm.  Flooding had become so widespread, that getting into Houston was out of the question. 

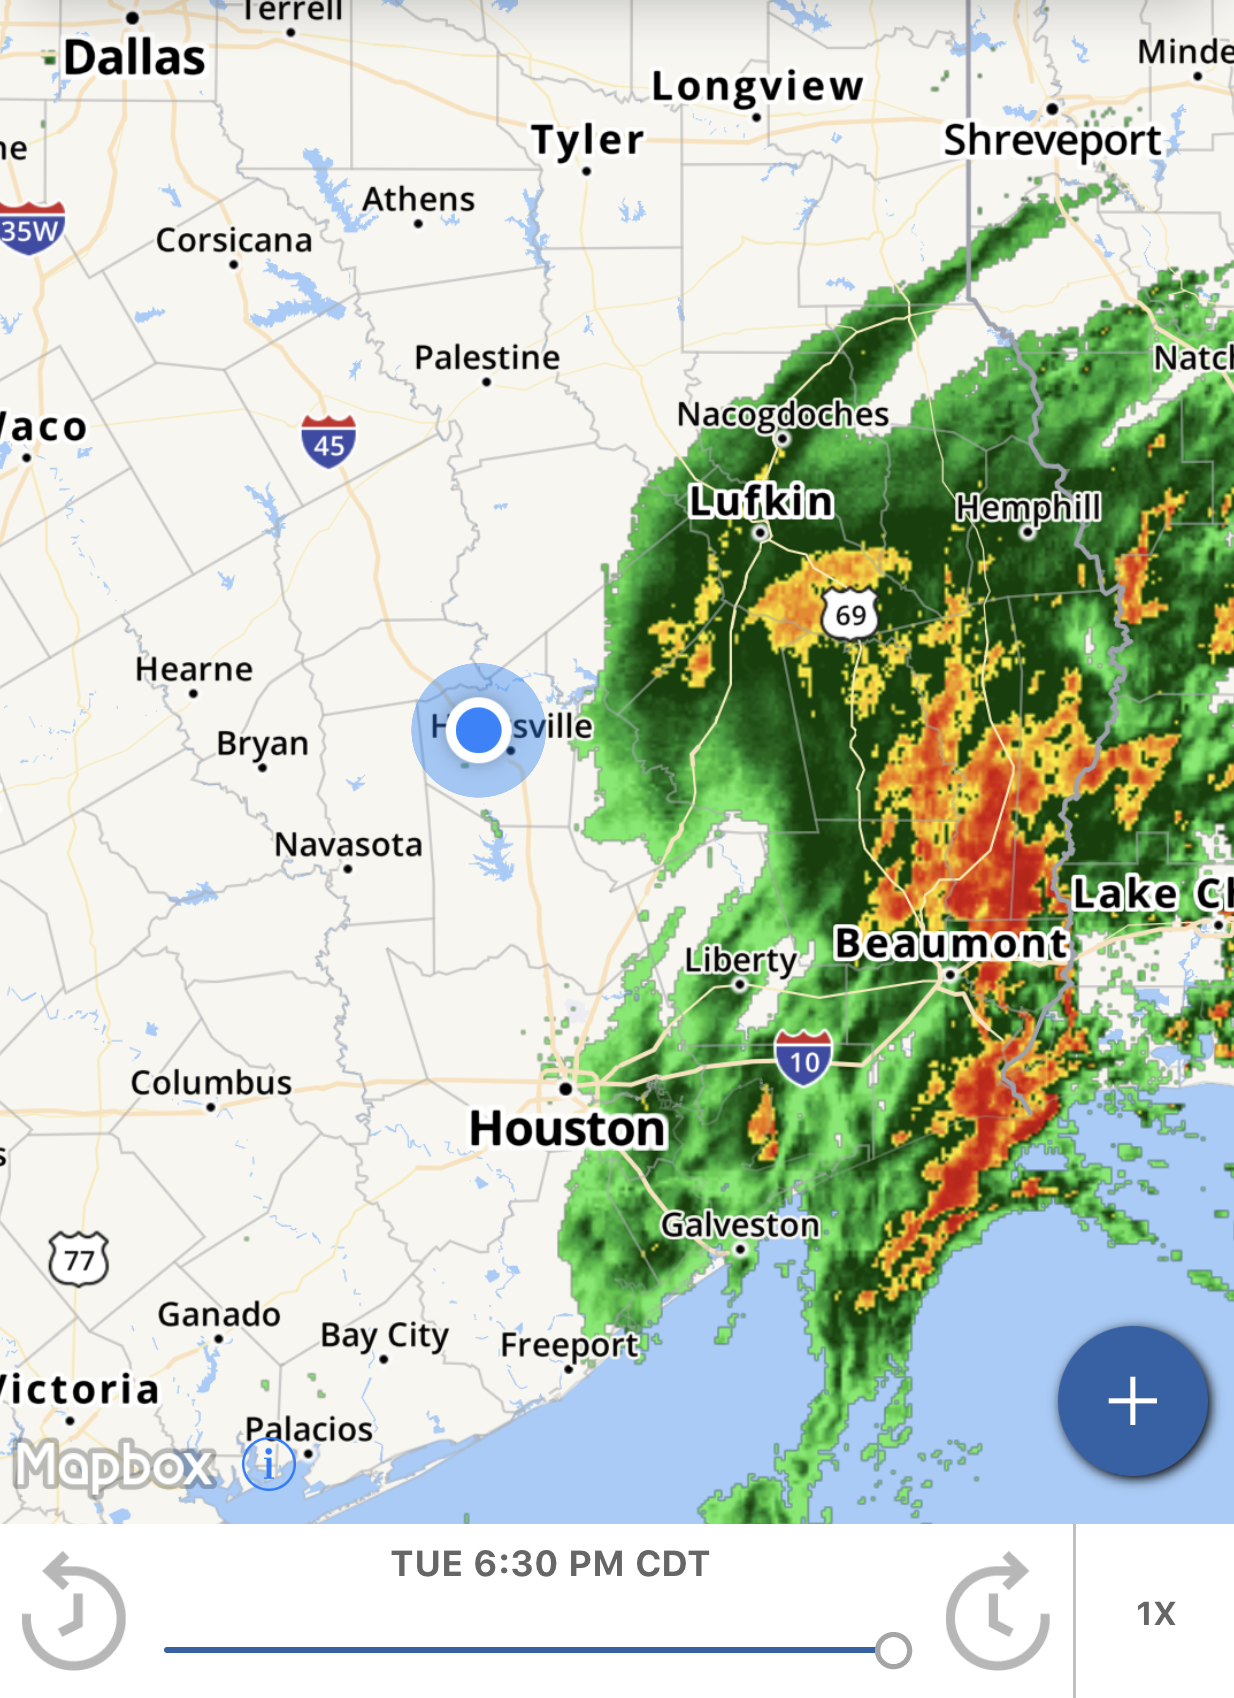
We decided we'd keep moving forward as if the trip would still happen. A lot can change in a week. This meant a very impromptu road trip to the Dallas Passport Agency on Monday morning. 

We were prepared for the worst when we left our home before sunrise, but the roads out of our area and northbound were all finally passable again.  I teared up as we drove north and saw the convoys of trucks towing personal boats and every manner of high-water vehicle and restoration truck driving south to Houston. 

We made it to Dallas.  Though we had the run around with getting the passports, in the end, we were successful and happy to finally have a day free of rain in our sister city.  

We stopped for groceries in Huntsville, hoping to avoid the shortages that were already being reported in our area.  The stores were fairly well stocked, but out of many fresh items like bread and milk.  

On our way home, we watched the clouds move east and the sun begin to shine again.  The rainbow that appeared seemed to really give finality to the storm, at least for us. 

Restoration

We know clean-up is just beginning for so many.   The long terms consequences from this storm may not be fully known for years to come. 

For us, it's checking on our neighbors and friends, opening up our guest room, lots of yard clean up and sharing what we can with those in need through our favorite local non-profit organizations, like Love Runs Deep

I'll always remember that rainbow.  ALWAYS. We are so thankful for our God's promises, for what they meant in Noah's time, now and in the future! Truly, we are so grateful for our many blessings and look forward to the real Restoration of All Things!


Interior Doors: Designer tips for a modern home

Interior doors. Why even think about them? Here's why... we missed a tiny note on our plans and it cost us time and money DURING framing! We shared more about that in this post. Luckily, we caught it on a walk through with our G.C. before it was way too late.

It is better to think about doors long before it is time to install them!

family photos modern door

What to consider

SCALE. Taller ceilings = taller doors.

We saw this in almost every modern home we visited during our research phase. This minor detail helped take this house from 'builder standard' to 'custom home'.

Standard interior residential doors typically measure 80" tall or 6'-8" (pronounced six-eight). With 9'-0" and higher ceilings throughout the house, adding the extra inches keeps the doors in proportion to the rest of the space. It also keeps it in alignment with our exterior swinging and sliding doors and the large banks of interior cabinetry. Yay for consistency! It also means my designer eyes won't start twitching from mismatched architectural elements! WIN, WIN.

interior doors designer tips modern home hall

STYLE. Keep it simple.

We spent endless hours researching door options that would fit our desired aesthetic AND our budget. We were seeking doors with a clean look, preferably solid core, and WITHOUT lots of recessed or raised panels or ornate trims.

interior doors designer tips

We also needed to be able to install the doors in a variety of operations. Swinging doors at bedrooms, pocket doors most other places. And in keeping with our desire for as much natural light as possible, we wanted a few doors with full-lite glass panels.

Other things to consider:

  • Operability (swinging, sliding, bifold, etc)

  • Hollow Core vs. Solid Core

  • Lites (glass inserts).

Here's what we installed

Solid Doors

interior doors designer tips for modern home slab door

Full Lite Doors:

  • "1-Lite, Full Slab, MDF Primed Interior Door" Locally sourced, similar to this door from Krosswood Doors.
  • Where we used them: Master Water Closet and Master Walk-in Closet
  • We saved some $ by adding frosted film ourselves instead of buying doors premanufactured with frosted glass.
  • 96" tall, varying widths

A note on Hardware:

Lastly, you can't install your modern door with any old hinge or knob and expect it to complete the picture--that's likely just what the subs will do.

interior doors designer tips for modern home door hardware

It's important to communicate with your general contractor about small details, like hardware, before it's time for installation day.  Stay tuned for an upcoming post with more hardware tips and our product line-up.

Interior Doors.  Focusing on this basic element of your home can make all the difference in creating a modern aesthetic. Pay attention early enough in the construction process and you will save time and money. Plus, you'll be less likely to get stuck with something you don't like.


Designer Tip: Check your plans and discuss door heights with your builder PRIOR to framing. Door heights can be assumed as standard, 6-8. Often, this can be listed in the General Notes of your plans or omitted all together since doors are typically all the same height and only mentioned if there is a door of unusual size.

Doors on more complicated projects or commercial projects are often called out and scheduled on separate pages of the construction documents.

Interior Doors Designer Tips for a Modern Home 1.png

Little Bitty Croft #4 has arrived

We are so excited to announce that amid the chaos of all these final details for the new house, our family has been blessed to celebrate the arrival of our newest Little Bitty Croft!  Our baby girl made her entrance at home on the afternoon of April 19th with the help of our awesome midwife and outstanding birth team! 

Stats: 8 lbs. 7 oz., 20" long 

Photo Credit: Isadora Photography

Modern Exterior Materials on a Modest Budget

"Is modern design scaleable?" 

When we started this process that was our biggest question. We toured many stunning modern homes... with crazy amounts of square footage chock full of expensive materials.  Could we build an equally attractive (and smaller) modern home on a more modest budget? 

Can being selective with exterior materials help your bottom line?

As we worked through the construction process, we realized that often the actual material cost is only part of the equation.  Finding skilled tradesmen willing to install a non-traditional material is another. Additionally, special materials can mean 'special order' and that can cause delays in the project schedule if not processed ahead of time.   

It's really a balancing act of each of those factors- Cost, Labor and Time.

Modern Exterior Materials on a Modest Budget.png

Our Materials:

  • James Hardie Artisan Siding
    • Fiber Cement Lap Siding, 5/8" thickness
    • Paintable
    • Thicker than typical siding and creates a stronger shadow line below each board for more dramatic appearance.
    • Can be mitered at outside corners or joined with a cap like we used.
    • More durable than wood
    • Approximately $12-18/SF
  • HardiePanel Vertical Siding, Smooth Finish
    • Fiber Cement boards
    • Paintable
    • Installs quickly.
    • Approximately $4-6/SF 
  • HardieTrim Boards, Smooth Finish
    • Paintable
    • Extra thick to match the depth of the lap siding
  • Tamlyn XtremeTrim
    • Aluminum Vertical and Horizontal Reveals
    • Paintable
  • Exterior Sheathing (carport and porch ceilings), painted
  • Cedar 4" Lap and Gap siding
    • Natural Wood, smooth sawn
    • Stain
    • Can source from your local lumber yard.
    • Approximate $4-7 SF 
  • Concrete
    • Used for walk ways, driveway, patio, porches and carport
  • El Dorado Longitude 24 Engineered Stone in Silent Grey
    • We had wanted to use this in the back of the house on the exterior of the fireplace wall.  As the design of our fireplace/ back patio evolved, we choose to save the money and eliminate this material from our pallet.  I am including it here because aesthetically, it is a perfect fit for this pallet of materials. We may come back to it in the future as we come back to develop that outdoor space more in years to come. 
    • Approximately $7-8/SF and $11-12 for corner pieces.
    • This is a longer lead-time item.  
    • Mix with El Dorado Zen 24 Engineered Stone in Nickel

Budget-Friendly tips:

  • Use your most expensive material judiciously.  Make it bold and a little can go a long way.
  • Use less expensive materials on less visible portions of the house.
  • Work in Phases.  Plan for bigger ticket "wants" from the beginning but install them at a later date.  Maybe add that stone fire pit in a few years, like we aim to do.
  • Choose items that can be sourced locally. You'll save on shipping costs.
  • Order special materials or trim pieces ahead of schedule to keep your project moving forward without delays. 
  • Work with your General Contractor to find experienced tradesmen skilled in more modern construction practices if you can. They will work more efficiently and make fewer mistakes if they are familiar with where to source materials and specialized installation methods.  All of this means, less wasted time and wasted materials! 
  • Don't always go with the lowest bid!  Remember the adage "Good work ain't cheap. Cheap work ain't good."

Love our color scheme?  Details in our post about Exterior Paint.

Exterior Paint Colors for a Modern House

Paint Colors.png

Where to Begin?

The idea of selecting paint can be a little overwhelming when you walk up to the wall'o swatches at your local paint store.  And if the idea of selecting one color is a lot... a whole scheme can be downright paralyzing. 

Start with a plan: 

Even as a designer, I am no stranger to the overwhelm of the fan deck.  To get started, we scanned back through all of our concept boards and inspiration images.  We made a general plan based on what we liked before even setting foot into the paint aisle.


Test it out:

We bought (a lot of) samples (and then more samples) and tested them out before making our final decision.  First, we painted some siding scraps, then when the siding went up on we did test patches on the front of the house.

Make a choice:

Ultimately, we selected the exact same color for the main siding that we had used when we repainted our current home a few years ago.  What can we say... we're a little sentimental over "Grays Harbor" and love that we can keep the color as a little reminder of our first home together as a family. 

Dare to be different:

Most traditional homes have a single trim color.  All trim and facia are painted that trim color.  The trim is usually the lightest color of the pallet (white or off-white).  Our rule for the trim was that it should be painted the same as whatever color it was adjacent to.  If you notice, there is trim around the windows, but they are painted to match adjacent siding instead of a contrasting color.


Our final selections:

modern-house-paint-extra-white-cadet-grays-harbor-2

Why it works:

  • Our exterior materials vary in scale and color
    • wide flat Hardie Board divided with Tamlyn reveals
    • taller than average Hardie Artisan lap siding
    •  narrower cedar lap and gap siding
  • Different colors on different materials
  • Monochromatic, cool color scheme with warm wood accents
  • High contrast on main elements with a tone in the middle for accent
  • Black or dark bronze anodized finish on aluminum window and door frames and exterior lighting.


Exterior Paint Colors for a Modern House.png

Design inspiration


We wanted to share what led us to build a house that looks and functions the way this one does.  

A lot of our inspiration comes from mid-century modern structures and homes, as well as, contemporary modern vernacular here in Southeast Texas.   

We are aiming to achieve a home that is comfortable, well-designed, thoughtful of our environment/site and that fits our family's lifestyle. 

A cornerstone of modern design philosophy is Louis Sullivan's often quoted "Form follows function" statement.  Many of our design decisions are outcomes of well thought out 'functional' expectations for our home.  

Our home features:

  • Efficient design, from space planning and HVAC to windows and plumbing
  • Open Plan Layout for main living spaces.
  • High ceilings
  • Ample natural light
  • Straightforward materials like polished concrete, warm walnut cabinets, and a simple backdrop of white walls. 
  • Generous exterior views of our National Forest surroundings.  

To say the least, we are smitten with the results and beyond excited to make this house our home. 

As far as keeping track of our ideas and inspiration, we used shared Pinterest boards and shared Houzz Ideabooks.  We also make it a point to go out and 'experience' modern design and modern spaces as often as we can.  Photos can be amazing tools, but they are no match for actually being in a space and experiencing it for yourself.  More on this in an upcoming post detailing the design process! 

For now... scroll... and scroll and scroll over some delicious inspiration from our Pinterst boards!


Exterior

Interior

Kitchen/Bar

Baths

Lighting

Kids

Weeks 13-15: Doors, Exterior Painting and Roofing

IMG_6826.jpg

The look of the house has changed dramatically since our last post.  All of the aluminum Milgard windows, aluminum Milgard sliding doors and temporary exterior doors are now fully installed.  The painters have caulked and done their first pass and will be returning this week to do any touch-ups.  We give our exterior paint specifics in our Exterior Paint Colors for the Modern Home post. The roofing crew also made fast business of getting the shingles on our simple low slope roof.  Lastly, floor protection went down inside to protect the slab which will be polished later.  

Spray foam insulation (and batt in a few key places for sound) is going in quickly this week.  The HVAC will also be installed this week with some special finishing details that we can't wait to share!

We've been busy finalizing cabinet drawings, quartz countertop, tile and decorative lighting selections as well as getting interior door quotes and ordering the last of the plumbing items.

Weeks 8-12: We've Been Framed

A LOT has happened on the job site in the last month, so much that we haven’t been able to keep up with the blog as much as we should!  Here’s a super fast rundown of all the progress we’ve been witnessing:

Outside, the siding is just about complete and we’ve selected paint colors, stone cladding and shingles, so we should see a more finished looking exterior soon!  The exterior wouldn’t be complete without windows and doors.  Our black aluminum windows and sliding doors have arrived and are nearly installed.

Although the interior work isn’t as dramatic as the exterior, various crews have worked hard to prepare for the coming sheetrock.  All of the electrical wiring and recessed lighting is installed.  A separate crew has pre-wired for whole-house audio and video distribution as well as networking and security systems.

Plumbing is the other major component that runs through the walls.   Everything is set including all of the rough-ins for showers, bathtubs and faucets.  We’ve also ordered most of the plumbing fixtures, which is a huge completion “check-mark” for us since there are so many selections and products to choose from.

We are hoping that we are nearing the end of finish selections.  We have a few more decorative lighting choices to make and final selections on tile. Keeping all of these items in budget is definitely a challenge and it will be nice to have these major decisions behind us in the not too distant future.

Next steps and things on the horizon:

  • Getting dried-in so that insulation and sheetrock can start. If it would just stop raining...

  • HVAC ducts installed.

  • Finalizing cabinet design.

  • Finalizing lighting and tile selections so that we don’t run into lead time issues.

Lastly… after ALL these decisions… what on earth are we going to name this new baby?

Living in a National Forest

sam_houston_national_forest_sign.jpg

Before purchasing our property, we didn't know that someone could buy property in a National Forest. Isn't it owned by the government? 

Apparently something exists called an inholding, which is private land inside the boundary of a national park, national forest, state park or similar public owned, protected area.  In our case, our property is inside the Sam Houston National Forest.

How is it possible to own land inside a national forest?

It's usually the case that the land was privately owned before the protected area was designated.  Our property was privately owned before the Sam Houston National Forest was established in 1936, so it remains private property just like any other property.  We didn't have to get any special approval to remove the trees needed to clear the land, but thankfully we were able to preserve many hardwoods on our property.

163,045 Acres in Our Backyard

One of the goals of moving our family was to have a little more space inside and outside.  We wanted a few acres for privacy and to have room to garden and enjoy a yard.  Finding property in the Sam Houston National Forest was a huge blessing.  Although we only have 2.5 acres, we backup to protected forest land that will never be developed!  A dirt forest service road runs behind our house leading to Lake Conroe, hiking trails and camping.  Having these kind of outdoor features right in our backyard is AMAZING!  We can't wait to explore the "neighborhood" and learn more about the forest that we live in.

Our Natural Neighbors

We're also excited to learn more about what neighbors we have that live in the forest.  We've seen deer and many birds.  Recently we even spotted a bald eagle soaring above our house!


Bald Eagle 🦅 sighting above our house! #letfreedomring #nationalforest #samhoustonnationalforest

A video posted by Amanda Croft (@hellocrofts) on


We know that bald eagles aren't an uncommon sighting on Lake Conroe in the winter months, so we're excited to stay on the look-out for these beautiful creatures.

Learn More About National Forests

What are the Differences Between National Parks and National Forests?

US Department of Agriculture Forest Service SHNF Official Website

Forests Infographic 

Discover the Forest YouTube Channel 

Sam Houston Nat'l Forest on Trip Advisor 

Sam Houston National Park Facebook


Weeks 6 & 7: Raising the Roof (and Walls)

Week six was a bit of a bust since we were waiting on some additional information regarding windows and doors, money from the bank and not to mention that weather wasn't great.  BUT... week seven didn't disappoint!  Framing began on Tuesday of week seven and it's absolutely amazing the amount of work that a good size crew can accomplish in such a short period of time! 

As an interior designer, one of my greatest thrills is to walk through a space in three dimensions that I have spent countless hours thinking through and envisioning down to every last detail that can be foreseen.  I do it for clients all the time and it's exciting, but seeing this labor of love come off of the piece of paper and into the real world is just exhilarating!  

Apparently, the scope of the framing crew includes not only the rough framing, but also the exterior sheathing and house wrap, window installation, the roof decking, and the siding.  So, even though they work fast, they will still be the main trade on-site for a while.  

Overall, we are very pleased with the design and construction to this point, but as with any project, things come up as the walls go up.  I'm glad we are able to make regular site visits to check on things and answer questions.  Here's what we have come across so far:

  • Windows - we needed to have all of the window specs thought out in advance so the framers would know what size to make the rough openings.  We had done a lot of research and had been knee deep in getting various quotes, but it wasn't until the last minute that we settled on a brand of windows that could meet all of our needs AND our budget.  Thankfully, they also had the shortest lead time, so hopefully we'll have windows to install in time and in the right sized holes.  
  • Doors - most people probably don't care what their interior doors look like and how they function as long as it works with the plans they purchase or have drawn up.  I, on the other hand, am what some may call 'opinionated'.  Can't help it, just part of the blessing/curse of the designer's eye.  It had been so long since we had the plans drawn up and when construction started, that we missed a general note about "All doors to be 80" tall U.N.O." Some door heights were specified on the plans, but I didn't catch that others were not. Also, since our plans did not include a door schedule (a keyed table itemizing each door and all of it's dimensions and specifics) like we typically do on commercial projects, it wasn't as easy to catch the differing heights.  So, my mistake for not catching this, but we are very likely going to have the framers reframe several doors to be consistent at 96" tall throughout the main house.   I'm a stickler for consistency and having major architectural elements align at the same heights with in the same spaces.
  • Furr downs - sometimes called "soffits", needed to be recognized in this stage because they often require a header or a beam to span the opening.  We just checked to make sure that our G.C. was aware of all the areas that would need to be furred out, especially on the kitchen cabinet wall and over the bathroom vanities.  No dust catching openings on top of our cabinets! This was in our original plans and our G.C. was on top of it for the win! 
  • Other small things that we noticed and are now more aware of, but that don't affect major changes to rough framing include:
    • Minor adjustment for framing in a recessed ironing board cabinet in the mud room.
    • Framing of shower/tub product niches that will be cut in by the tile installers later (this is a relief since I don't know the exact tile sizes yet and I want the niches to align nicely with the courses of tile). 
    • Some toilet waste lines that will have to get re-centered (moved by a few inches here or there) now that the walls have gone up around them.
Designer Tip:
U.N.O. is an abbreviation used regularly on construction documents to mean "unless noted otherwise".  It means that condition, what ever is being referenced,  is to be met for all occurrences unless specifically stated as unique for a certain occurrence. 

Next steps on the horizon and things in the works:

  • Quotes and specifics for all interior and exterior doors, including some heavy research for all the pocket doors (x8... yes.. 8) that we have in the project.
  • Quotes and specifics for all plumbing fixtures as plumbers will be on-site soon to install product specific rough-in valves, etc.
  • Working on having the HVAC system engineered as we have now spotted some potential challenges during the framing stage. 
  • Starting process of custom cabinet specifics.  We've done a rough ballpark quote with one millwork shop in town, but we need to get into the nitty gritty with them to get the details of materials, layouts, accessories, lead times, etc. worked out.  

Weeks 4 & 5: Well, Let's Wait

After getting a quick start with the pad, forms and foundation, the last two weeks weren't as busy at the job site.  Well, at least for the crew.  Our family spent one Sunday cleaning up limbs, sticks and roots from the clearing and building a fire ring in anticipation of hosting our first guests.  Just cause we only have dirt and a foundation wasn't going to stop us from having a little bonfire the Friday after Thanksgiving complete with hot dogs, chili and s'mores. 

Little bonfire on the left.  We didn't make much of a dent in the wood pile in the background.  More bonfires to come!

Little bonfire on the left.  We didn't make much of a dent in the wood pile in the background.  More bonfires to come!


The last two weeks weren't totally wasted.  We completed one essential part of the entire project.  The well.

Pretty, isn't it? We'll end up enclosing this and maybe make it into an outdoor storage area with hose.

Pretty, isn't it? We'll end up enclosing this and maybe make it into an outdoor storage area with hose.

The crew had to dig to 325 feet to tap into the aquifer below.  There's not too much to see for all that digging except for a tank outside the bedroom side of the house, but we should have plenty of water for years to come.  Well, once we get power.

We've had a temporary electric pole in place for several weeks, but it's not doing anything for now.  The power company and the county have an agreement that electricity won't be run to a new construction project until you have a building permit.  Since we're also installing a septic system, we need a permit for that too.  The officials required the building permit and the septic permit submitted together.  The government red tape is really piling up and we're not even inside the city limits.

Someone else that wants our building permit is the bank.  Before any money is released for the first draw, the bank requires a building permit, insurance and an inspection of the progress.  So everything up until this point has been done without any money from our construction loan.  This process surprised us and required some careful planning by our builder.

Thankfully, after moving at the speed of government, last week we were able to get all the permits and other required documentation to the bank to get some financial relief and to the power company so that they will get us power in the next few weeks.  A lack of power isn't going to stop our progress.  Framing is next and should start later this week.  It's time to start raisin' some walls!

Week 3: We've Got Concrete!

Week three feels like we got to experience the birth of our house.  The foundation went in on a drizzly morning with about sixteen trucks (AKA FYI "concrete transport trucks", or "in-transit mixers"... yes, I had to Google it) pulling up one after another, sometimes even doubling up at the pumper truck. Since the flooring throughout the house will be polished concrete, this day felt especially important.  We won't be staining or covering up the foundation with an additional flooring material, so they had to get it just right.  As framing begins and other trades move onto the job site, we will have to protect the concrete from damage and stains.  Polishing concrete can be done before framing begins or after framing has gone up, but the slab must cure for 28 days before being polished.  We have elected to continue with framing and polish later to keep on track with the construction schedule. 

The bedroom side of the house (on right in video) is 6" higher than the main living area.  This was to give the feeling of a transition.  Along with the lowered ceiling heights, it is a subtle clue that this is a more private area of the home. There are two single steps up through the six foot wide Study and the Play Room openings.  At these steps we designed a small reveal to break up the flat vertical face of concrete when viewed from the lower level.    BIG fan of the 'reveal', right here!

Designer tip:
Use reveals at changes in materials or changes in plane.  This trick adds visual interest, creates a pleasing shadow line and helps to conceal imperfections or differing tolerances where surfaces come together!

Forms still in place for the reveals at the Play Room and Study steps.

Proportionally, the reveal is approximately 1/3 the overall height of the step.  The fairly shallow depth still allows for easy cleaning.  Don't mind the leaves Mother Nature hasn't swept away just yet.

Dry wall and 6" baseboards will flank the 6' wide openings on either side.


Foundation Day

The day has come!  Bring on the foundation!!!! Pour away!

Mark was out-of-town for the INBOUND 2016 conference in Boston this week, so sadly, he missed the BIG event at the property.  The kids and I made it out just in time for the main level, carport and guest room to be poured.  On the drive up, I was concerned about the rain, but our G.C. said that it was actually better to pour on a cooler day with a little moisture.  Hotter days cause the concrete to dry too quickly.  Thankfully it was just a drizzle and cleared fairly quickly.


Week 2: Dirt, Dirt, and More Dirt!

It is amazing to finally feel like we are making some progress.  Things are happening, things are moving... mostly dirt!  After the sad loss of our first camera during land clearing last week, we are happy to be back up and recording.  Enjoy this quick little time lapse of week two.  Even with all that digging for the beams and plumbing, no camera was to be found in all that dirt they brought in.  Oh well.   

Forms, plumbing, trenches for beams, rebar, and concrete vapor barrier.  

Away we go!

Land Clearing

WAY back in 2015 we had an initial clearing done in order to stake out where we wanted the house to go.  The purpose of this was to have a soil test preformed for the structural engineer to appropriately design the house's slab.  

Last month we went out to stake out a slightly different site for the house.  Since we have had quite a bit of time to think about it, we decided that the house should be closer to the road for more useable backyard space and to give added privacy from the neighbors home which is fairly close to the property line on the north side of the lot.  

With the brush cleared out we got to finalize where the house will go and decided what trees would stay and what trees that would need to be removed.

While we were out-of-town over the past two weeks, down came the trees that we couldn't keep, and sadly the brand new time lapse camera (which is likely buried somewhere in the soon-to-be foundation). Due to a slope on the site, the contractors doing the dirt work brought in FIFTY-THREE loads of dirt to level things out!  We're ready for the forms, pouring the slab is next!


What you have to do before you move any dirt

Everyone will tell you that building a home takes longer than you think.  What you might not realize is how much has to be done before you move any dirt.  This is especially true if you are building a custom home and super especially true if you're designing the home yourself.

Here's a list of what we've done in order before moving any dirt.

1. Find property

Finding the right property certainly is a challenge.  There are so many different factors to consider.  What area do I want to be in?  What size property do I want?  What features do I want?  School districts.  Tax rates.  Area amenities.  Work proximity.  Etc, etc. etc...

For us the property search began probably about a year before we found our land.  We'll write an other post detailing that process and what we ended up buying.  If you don't want to be in a development, then count on this potentially taking a long time.

2. Design the house

For most people this means find a house plan that you like.  There are thousands to choose from.  Some custom home builders have plans you can use or you can search for your own on a site like houseplans.com.  Some firms also offer "Design Build" service which means they have designers that will create the house you want and then they build that house.  This is a great option and one that gives the best collaboration between those designing your house and those building your house. 

We started by looking at existing plans and ultimately found our house designer because of his plans on houseplans.com.  He just happened to be in the next town and so we were able to meet with him in person to discuss our project.  We talked about modifying one of his existing plans but decided to have him draw up custom plans for us based on Amanda's sketches.

Because of a variety of factors, this process took about 10 months to complete.  Ideally it should be a 2-3 month process.

Cost: $4500

3. Structural Plans/Soil Test

The architect or designer will create construction documents for the builder, but you'll also need structural plans from an engineer.  Since our house is slab on grade construction, the structural plan is especially important so that the foundation is engineered correctly.  This requires a soil test.

The soil test involves taking core samples and then having them tested.  A report is given to the structural engineer.

The soil test took about 2 weeks and cost $1,200.

The structural engineering work took about a week and cost $1,000

4. Builder

Perhaps one of the most important steps is finding a builder.  We talked to four builders before settling on Sierra Custom Homes.  The builder can give you a general idea of cost per square foot, but will need the construction documents and interior specifications before an estimate and contract can be generated.  The more the builder has either the house design or the interior design services as part of their services, the easier this will be on you.  Since Amanda is an Interior Designer and we have a pretty good idea of what we want, this wasn't a huge factor for us.  The main issue we had was communicating what we wanted to build since it's not a typical suburban house.

5. Financing

This is the least fun part of the entire process.  A bank is investing a lot of money in your project and they are going to make you jump through all kinds of hoops to get it.  Like a typical mortgage, the bank is going to want all of your financial documentation, but they are also going to want the construction documents and documentation on the builder.  The bank has to approve the builder and they do this by looking at other projects, business history and various insurance policies.

The bank will also hire an appraiser to value the entire project.  This means a value on the land as well as the house once it's built.  We've had a nightmare with the appraisal process and are currently waiting on a second appraisal.

Don't count on this process going quickly.  I hope our experience is a huge exception since we've currently been in the financing stage for 5 months (3 of those months just on the appraisal).  All the banks I talked to said 5-6 weeks, but I'd count on more time than that.